This is the full developer documentation for superglue
# Introduction
> Build production-grade integrations in minutes.
superglue is an agentic integration platform for systems ordinary connector libraries cannot reach. Its agents learn how your systems work, build production-ready tools and workflows, and keep them running.
In broad terms, superglue agents work as follows:
1. **Gather relevant context:** Pull requirements and real examples from Slack, Microsoft Teams, email, meeting notes, files, system documentation, web research, and agent knowledge.
2. **Read and write data across systems:** Query records, update data, move files, transform payloads, and coordinate authenticated actions across APIs, databases, and file servers.
3. **Monitor and investigate runs:** Follow run history, logs, timing, notifications, and errors, then use the agent to diagnose failures and repair workflows.
## Why use superglue
Connect anything
Work with REST, GraphQL, SOAP, Postgres, MSSQL, Redis, FTP/SFTP, and any legacy system. superglue reads documentation, implements authentication, and writes the transformations each connection needs.
Build from intent
Describe the outcome in natural language. The agent discovers endpoints, tests requests, maps data, and produces an executable tool without manual endpoint wiring.
Adapt when systems change
Inspect, test, and refine integrations through conversation. When an API or data shape changes, superglue diagnoses the failure and repairs the tool instead of leaving you with a broken workflow.
Run securely in production
Execute on managed infrastructure with server-side credentials, retries, rate limiting, schedules, and full observability. No servers, queues, or cron jobs to operate yourself.
## What runs on superglue
Core use case
### System migrations
Replace brittle, one-off migration scripts with observable, repeatable tools and playbooks. Extract data from legacy ERPs, CRMs, and databases, transform schemas, validate records, and recover cleanly when a step fails.
Legacy systems
superglue
Modern stack
### Operational syncs
Keep old and new systems aligned during a transition with scheduled, bi-directional data flows and explicit conflict handling.
### Legacy system tools
Turn undocumented ERP, warehouse, and internal system capabilities into reusable tools for your modern applications and teams.
### Agent-driven automation
Give AI agents controlled access to query databases, call APIs, extract data, and map information across disconnected systems.
# Concepts
> Understanding superglue fundamentals
Systems, credentials, tools, and runs are the core building blocks used throughout superglue.
## Systems
Systems are reusable connections to APIs, databases, file servers, and other services. Each system stores the endpoint, authentication requirements, and instructions needed to interact with that service.
Unlike a fixed connector library, systems can be configured for custom or legacy services as well as REST, GraphQL, SOAP, SFTP, SQL Server, PostgreSQL, Redis, and other supported protocols. See [Creating a System](/docs/guides/creating-a-system/).
## Credentials
Credentials provide the authentication a system needs. A system declares expected secret names such as `api_key`, `username`, or `password`; a credential stores the corresponding secret values securely.
One system can have multiple named credentials, while each credential belongs to exactly one system. A run uses the selected credential or the user’s default accessible credential for that system.
## Tools
Tools define repeatable actions across systems. They accept inputs, execute request or transform steps, and return a structured result. The agent helps build and test tools from your instructions; saved tools then execute the same configuration deterministically.
Tools can be run from the app, API, SDKs, CLI, MCP, schedules, or webhooks. See [Creating a Tool](/docs/guides/creating-a-tool/).
## Runtime
The runtime resolves credentials, makes external calls, applies retries and rate limits, executes transforms in a secure sandbox, and records the result. You do not need to host separate workers, queues, or cron infrastructure.
Every execution creates a run with its status, timing, step results, and errors. See [Deploying a Tool](/docs/guides/deploying-a-tool/) for the available execution paths.
# Setup
> The 5-minute guide to building your first superglue tool
Choose superglue Cloud for the fastest setup, or run the open-source version in your own environment.
## Hosted version (recommended)
Get started in under 5 minutes with no infrastructure setup.
1. **Sign up at app.superglue.cloud**
Or [book a demo](https://cal.com/superglue/superglue-demo) to talk to our team first.
2. **Connect a system**
Click one of the system icons (Slack, Stripe, GitHub, etc.) or describe the system you want to connect in the agent chat:
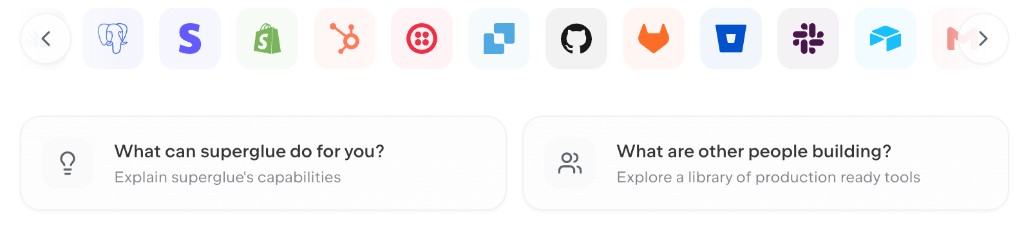
The agent will guide you through authentication and configuration.
3. **Build and test a tool**
Describe what you need — the agent will set up your tool, test it, and let you review before saving.
4. **Execute or schedule**
Save the tool, run it on demand, schedule it, or trigger it through a webhook.
## Open-source version (self-hosted)
**Prerequisites:** Docker, a PostgreSQL database, S3-compatible object storage (AWS S3 or MinIO), and an LLM API key.
1. **Create .env file**
For full environment setup, see [Production setup](#production-setup) below or the [.env.example](https://github.com/superglue-ai/superglue/blob/main/.env.example).
Object storage is a required dependency. Configure either AWS S3 or MinIO before starting superglue. The container command below starts only superglue, so PostgreSQL and object storage must already be running and reachable from the container.
2. **Run**
Run the following command:
```bash
docker run -d \
--name superglue \
--env-file .env \
-p 3001:3001 \
-p 3002:3002 \
superglueai/superglue:latest
```
3. **Access dashboard and API**
* Web app:
* REST API:
### Local development
```bash
git clone https://github.com/superglue-ai/superglue.git
cd superglue
cp .env.example .env
```
Edit `.env` with your configuration, then:
```bash
# Optional: start the bundled PostgreSQL and MinIO services.
docker compose --profile infra up -d postgres minio minio-init
npm install
npm run dev
```
When using the bundled infrastructure, set `POSTGRES_HOST=localhost`, `S3_PROVIDER=minio`, `S3_ENDPOINT=http://localhost:9000`, and `S3_PUBLIC_ENDPOINT=http://localhost:9000` in `.env`.
### Production setup
For production deployments:
```dotenv
# ===================
# REQUIRED
# ===================
# Deployment
DEPLOYMENT_MODE=enterprise
# Public endpoints
API_PORT=3002
WEB_PORT=3001
PUBLIC_API_URL=https://your-domain.com:3002
PUBLIC_APP_URL=https://your-domain.com:3001
# Authentication and encryption
# Generate separate values with: openssl rand -hex 32
JWT_AUTH_SECRET=replace-with-random-secret
INTERNAL_API_TOKEN=replace-with-different-random-secret
MASTER_ENCRYPTION_KEY=replace-with-random-encryption-secret
AUTH_PROVIDERS=email_password
AUTH_DISABLE_SIGNUP=false
AUTH_DISABLE_INVITES=false
# Set false only when superglue must connect to private or on-prem systems.
BLOCK_LOCAL_REQUESTS=true
# PostgreSQL
POSTGRES_HOST=your-postgres-host
POSTGRES_PORT=5432
POSTGRES_USERNAME=superglue
POSTGRES_PASSWORD=secure-password
POSTGRES_DB=superglue
POSTGRES_SSL=true
# Object storage
# This example uses AWS S3. See Object Storage below for MinIO.
S3_PROVIDER=aws
AWS_S3_REGION=us-east-1
AWS_BUCKET_NAME=your-bucket-name
AWS_BUCKET_PREFIX=raw
# Optional: omit these to use the AWS SDK default credential chain.
# AWS_S3_ACCESS_KEY_ID=your-access-key
# AWS_S3_SECRET_ACCESS_KEY=your-secret-key
# LLM provider
PRIMARY_LLM_PROVIDER=gemini
PRIMARY_LLM_MODEL=gemini-2.5-flash
SUMMARIZE_LLM_PROVIDER=gemini
SUMMARIZE_LLM_MODEL=gemini-2.5-flash
GEMINI_API_KEY=your-gemini-key
# Runtime behavior
START_SCHEDULER_SERVER=true
WEB_SEARCH_PROVIDER=disabled
# ===================
# OPTIONAL
# ===================
# Set these when containers use private service URLs that differ from public URLs.
# INTERNAL_API_URL=http://superglue:3002
# INTERNAL_APP_URL=http://superglue:3001
# Tavily web search
# WEB_SEARCH_PROVIDER=tavily
# WEB_SEARCH_API_KEY=your-tavily-key
```
Set `START_SCHEDULER_SERVER=true` on application instances that should claim scheduled work. Set `POSTGRES_SSL=false` only for a local or otherwise unsecured PostgreSQL server. `BLOCK_LOCAL_REQUESTS=true` prevents tool execution from reaching private and link-local networks.
### Object storage
Object storage is required. superglue validates this configuration during startup and has no storage-disabled mode. It stores system documentation, uploads, processed files, and run artifacts in either AWS S3 or MinIO. Choose exactly one provider. Create the bucket before starting superglue and ensure the configured identity can list, read, write, and delete objects in it.
* AWS S3
Add to your `.env`:
```dotenv
S3_PROVIDER=aws
AWS_S3_REGION=us-east-1
AWS_BUCKET_NAME=your-bucket-name
AWS_BUCKET_PREFIX=raw
# Optional: omit these to use an instance role, task role, web identity,
# or another source in the AWS SDK default credential chain.
AWS_S3_ACCESS_KEY_ID=your-access-key
AWS_S3_SECRET_ACCESS_KEY=your-secret-key
# AWS_S3_SESSION_TOKEN=your-session-token
```
The S3 bucket must already exist. Uploaded files are stored in it and automatically parsed after upload.
* MinIO (Self-Hosted)
[MinIO](https://min.io) is an S3-compatible object store you can run alongside superglue.
Add to your `.env`:
```dotenv
S3_PROVIDER=minio
S3_ENDPOINT=http://minio:9000
S3_PUBLIC_ENDPOINT=http://localhost:9000
MINIO_ROOT_USER=minioadmin
MINIO_ROOT_PASSWORD=change-me-in-production
MINIO_BUCKET_NAME=superglue-files
MINIO_BUCKET_PREFIX=raw
```
`S3_ENDPOINT` must be reachable by the superglue server. When users’ browsers need a different URL, set `S3_PUBLIC_ENDPOINT` to that browser-reachable URL so presigned file URLs are rewritten correctly. For example, a Docker Compose deployment can use `http://minio:9000` internally while browsers use `https://files.your-domain.com`.
The MinIO bucket must already exist. The repository’s `minio-init` Docker Compose service creates it automatically when you start the `infra` or `all` profile.
# CLI + Skills
> Set up AI agents to build and manage superglue tools via the CLI and superglue skill
AI coding agents work best when they understand the systems and tools available to them. The superglue CLI includes a skill that teaches agents how to authenticate, use `sg` commands, build tools, and investigate failures.
## Install the CLI
Install the CLI, sign in, and confirm the active account:
```bash
npm install -g @superglue/cli
sg login
sg whoami
```
For CI or another non-interactive environment, configure an API key instead:
```bash
export SUPERGLUE_API_KEY="your-api-key"
export SUPERGLUE_API_ENDPOINT="https://api.superglue.cloud"
```
See the [CLI overview](/docs/cli/overview/) for authentication and usage, or the [command reference](/docs/cli/commands/) for every available command.
## Install the skill
Install the superglue skill for any supported coding agent:
```bash
npx skills add superglue-ai/cli
```
The installer detects supported agents automatically. To target one agent globally, run `npx skills add superglue-ai/cli -g -a `.
## What the skill provides
* CLI commands, flags, and authentication patterns
* System, credential, tool, and execution schemas
* Workflows for testing systems and investigating failed runs
* Focused references for HTTP APIs, databases, file servers, transforms, and integrations
## Add project context
The skill teaches an agent how to use superglue. Add a short instruction to `AGENTS.md`, `CLAUDE.md`, or your agent’s equivalent file so it also discovers the current project setup:
```markdown
## Using superglue
Before working with superglue:
1. Read the superglue skill and the references relevant to the task.
2. Confirm that the CLI is authenticated.
3. Run `sg system list` and `sg tool list` before building or changing anything.
4. Discover system and tool IDs instead of hardcoding them.
```
## LLM-readable documentation
Agents that do not support skills can use [llms.txt](/llms.txt) as a lightweight documentation index or [llms-full.txt](/llms-full.txt) for the complete documentation in one file.
## More resources
* [skills.sh](https://skills.sh) — install the superglue skill for supported AI agents
* [CLI repository](https://github.com/superglue-ai/cli) — source code and release information
* [GitHub Issues](https://github.com/superglue-ai/cli/issues) — report bugs or request features
# superglue for non-coders
> From your first conversation to a working tool.
superglue connects your systems and turns plain-language requests into reusable tools. Start by telling the agent what you want to accomplish; it guides you through connecting systems, adding credentials, testing the result, and choosing how the tool should run. This guide explains the main concepts and screens you will use along the way.
## Good to know
### System
An API, database, file server, or other service that superglue can interact with.
### Tool
A saved, repeatable action that reads or writes data through one or more systems.
### Credential
A named set of secret values that grants access to one system.
### MCP server
A collection of tools that AI clients can discover and run through MCP.
## Find your way around
The main areas of the superglue app are:
1. **Agent:** Describe what you want to build, ask questions, or investigate a failed run in plain language.
2. **Systems:** View and configure the APIs, databases, file servers, and other services connected to superglue.
3. **Credentials:** Add or manage the named credentials that grant access to each system.
4. **Tools:** Review, test, and manage the reusable actions built across your systems.
5. **Runs:** Inspect execution history, results, timing, and errors.
6. **Control Panel:** Manage schedules, MCP servers, access rules, and organization settings.
## Create a tool
1. **Start a conversation with the agent**
Open a new chat and describe the outcome you want.
2. **Explain the task in plain language**
For example: “Move new Salesforce accounts into BigQuery.” A rough description is enough; the agent asks for missing details.
3. **Connect the required systems**
The agent helps configure each system and asks you to add credentials when access is required.
4. **Review and test the tool**
The agent builds the steps, tests them with you, and shows what the tool will read or change before you save it.
5. **Choose how the tool runs**
Run it on demand, schedule it, trigger it with a webhook, or expose it through an MCP server.
[Build a tool in superglue](https://drive.google.com/file/d/1nX5AatG_MLiKDqxQgg-B4wkzGRg-XpC9/preview)
## Add credentials
A system declares the secret names it needs, such as an API token, username, or password. A credential contains the corresponding secret values and belongs to that system. One system can have multiple named credentials, so different users or accounts can use the same system configuration without sharing secret values.
How you connect depends on the system:
* **API token:** Enter the value when prompted; superglue stores it encrypted.
* **OAuth or SSO:** Sign in with the provider and approve access; superglue stores the resulting tokens securely.
* **Username and password:** Enter both values as encrypted secrets.
* **Connection details:** Add the host, database, username, password, and other values required by the data source.
When a tool runs, superglue uses the credential selected for each system or your default credential. Secret values are not included in agent prompts.
[Adding credentials](https://drive.google.com/file/d/1Jz_JHQ6jnvMX4vot8GlYUQ1x9ZZd8sJA/preview)
## Use a tool in Langdock
1. **Create an MCP server**
In the Control Panel, create an MCP server and add the tools you want to make available. You can also ask the agent to do this.
2. **Export it for Langdock**
Choose the Langdock export format and download the generated configuration.
3. **Import it into Langdock**
In Langdock, open Integrations, add a new integration, and import the configuration.
4. **Add the connection**
Select the imported tools you want to expose and finish the connection setup.
5. **Use the tools in chat**
Ask for the data or action you need in plain language. Langdock calls the appropriate superglue tool.
[superglue in Langdock](https://drive.google.com/file/d/1zIEoeurvTb-DUrDyKz3x-n9JFTyZ317J/preview)
## Security and access
* **Saved tools are deterministic:** The agent helps build and test the configuration; saved runs execute that configuration consistently.
* **Secret values stay protected:** Credentials are encrypted, and their values are not placed in agent prompts.
* **Access still applies:** Users can run tools only with systems, credentials, and other resources they are allowed to use.
* **Self-hosted deployments stay under your control:** The application, data, credentials, and execution infrastructure run in your environment.
If you are unsure where to start, describe the outcome you want in the agent chat. It will guide you through the required systems, credentials, and tool steps.
# Let agents manage systems without pre-building tools
> Connect systems once, then let agents retrieve context and execute the right operations at runtime.
Most agents can act only through a fixed catalog of tools. Every supported action has to be anticipated, mapped, and deployed before the agent can use it. superglue removes that constraint: connect a system once, give the agent access, and let it retrieve the relevant system context and assemble the required read or write operation at runtime.
The system defines how to interact with a service. superglue resolves an allowed credential only when the operation runs, so the agent works with secret names rather than secret values.
## What this unlocks
A user can ask “get my last five invoices” and then “update the billing email for customer X.” The agent can execute both requests through the same system without someone pre-building two separate tools.
Inspect every operation
Each execution creates a run record with the generated configuration, systems called, results, timing, and any errors.
Keep secrets protected
API tokens, OAuth tokens, and passwords remain in superglue credentials and are resolved only during execution.
Control agent access
API-key restrictions, roles, and direct sharing determine which systems and credentials an agent can use.
## How it works
Your agent uses the superglue CLI (`sg`) and the [superglue skill](/docs/getting-started/cli-skills/#install-the-skill). The skill provides the command, authentication, and configuration context needed to work with superglue safely.
1. **Discover available systems**
```bash
sg system list
```
2. **Retrieve relevant system knowledge**
The agent searches documentation stored in the system’s knowledge base instead of guessing endpoint shapes or data models.
```bash
sg system search-docs --system-id stripe -k "list invoices"
```
3. **Execute the required operation**
The agent can run an inline configuration without first saving a permanent tool.
```bash
sg tool run --config '{
"id": "get-invoices",
"instruction": "Fetch recent Stripe invoices for a customer",
"steps": [{
"id": "list-invoices",
"config": {
"systemId": "stripe",
"url": "https://api.stripe.com/v1/invoices?customer=<>&limit=5",
"method": "GET",
"headers": {"Authorization": "Bearer <>"}
}
}]
}' --payload '{"customerId": "cus_abc123"}'
```
4. **Return and monitor the result**
The agent returns the result to the user, while superglue records the run for monitoring and failure investigation.
## Setup
Follow [CLI + Skills](/docs/getting-started/cli-skills/) to install and authenticate the CLI and add the superglue skill to your agent. Then [create the systems](/docs/guides/creating-a-system/) the agent should use and grant only the access it needs.
# Creating an MCP Server
> Expose saved superglue tools to MCP clients with scoped access and credentials
An MCP server makes saved superglue tools available to MCP-compatible clients such as Claude Code, Cursor, Codex, and Langdock. It controls which tools a client can discover, who the client acts as, and which credential sets tool runs use.
Ask the superglue agent to create or edit a custom MCP server at any time. For example: **“Create an OAuth MCP server named Sales Assistant with the get-customer and create-invoice tools.”**
## Default or custom MCP server
Default: All Tools
The default MCP server is always available at `/mcp`. It has no manually configured tool list, so it exposes every active saved tool the connecting identity can access through RBAC. It is read-only and does not support server-level credential pinning.
Use it for personal setup, exploration, or a client that genuinely needs broad access.
Custom: Selected Tools
A custom MCP server has a named endpoint and an explicit tool list. It can use OAuth or the creator’s API key and can pin credential sets for individual systems.
Use one for shared assistants, production agents, and any integration that should expose a small, purpose-specific surface.
“All Tools” does not bypass RBAC. It means there is no additional server-level allowlist; each connection still sees only the tools permitted for its authenticated identity.
## Create a custom MCP server
1. **Ask the agent or open MCP Servers**
Describe the audience, the task, and the tools the server should expose. The agent can create the server directly, or you can select **MCP Servers** in the app and create one manually.
2. **Select the tools**
Add only the saved tools the MCP client needs. This list limits what the server can expose but does not grant users access to those tools.
3. **Choose an authentication mode**
Use OAuth for users with individual superglue accounts. Use a creator API key for a trusted headless or internal client that must act as the server creator.
4. **Choose credential behavior**
Leave a system unpinned to use each connecting identity’s default accessible credential set, or pin a specific shared credential set for consistent execution.
5. **Save and export**
Use **Export** to download the exact configuration for your MCP client. When you change a server’s tools or credential pins later, reconnect the client to start a new MCP session with the updated configuration.
The agent can also add or remove tools, switch authentication mode, rename the endpoint, or change credential pins later. Members can edit servers they created; admins can edit any server in the organization.
## Choose authentication by use case
OAuth (recommended)
**Use for:** team-wide assistants and clients used by multiple people.
Each person signs in with their own superglue account. Tool visibility, system access, and credential access are evaluated for that person. Unpinned systems use their default accessible credential set.
OAuth servers also expose an `authenticate` helper tool that can send a user to superglue when a required system credential is missing.
Creator API key
**Use for:** trusted headless automation, private backend clients, or users who do not have superglue accounts.
The client sends an active API key assigned to the server creator. Every client using that key acts as the creator and receives the creator’s RBAC, system, and credential access.
These servers do not advertise MCP OAuth and do not expose the `authenticate` helper tool. Keep the key server-side and rotate or revoke it like any other privileged secret.
The authentication-mode selector applies to custom servers. The default server has no stored mode: it accepts a valid superglue bearer identity and advertises OAuth discovery to unauthenticated MCP clients.
## RBAC determines the effective tool set
An MCP server configuration is not an authorization grant. Define RBAC rules for the people or service identity that will connect before sharing the endpoint.
1\. Server scope
The default server starts with all active tools. A custom server starts with only its selected tool IDs.
2\. Tool access
Discovery filters that set using the authenticated identity’s current tool grants. A selected tool without an effective grant is not exposed.
3\. Execution access
Every run checks the tool again and verifies access to each system and credential set the tool needs. Passing discovery does not bypass these execution checks.
The resulting access model is:
```text
Default server tools = RBAC-allowed active tools
Custom server tools = selected tools ∩ RBAC-allowed active tools
Successful run = visible tool + required system access + accessible credentials
```
For OAuth, the authenticated identity is the person who signed in. For creator API key authentication, it is the server creator. Sharing a creator API key therefore shares the creator’s effective access with every holder of that key.
Adding a tool to a custom server does not grant access to it. Grant the intended users access to the tool and its required systems through RBAC. Grant access to a pinned credential set as well when the server uses one.
## Pin credentials for consistent execution
Custom MCP servers can store a `pinnedCredentials` map from each system ID to the credential-set ID that should be used when a tool on that server runs:
```json
{
"salesforce": "credentials-salesforce-service-account",
"stripe": "credentials-stripe-billing"
}
```
At execution time, superglue resolves credentials independently for every system used by the tool:
1. **Use a pin when the system is listed**
The runtime selects that exact credential set for every tool on this MCP server that uses the system.
2. **Use the connecting identity’s credentials when it is not listed**
The runtime prefers the identity’s explicitly selected default credential set. If there is no explicit default, it uses the longest-held accessible set.
3. **Enforce access in both cases**
The authenticated identity must be able to access the required system and the selected credential set. An inaccessible or mismatched pin fails the run; a pin never bypasses RBAC.
Pin a credential when all users should act through the same shared service account. Leave it unpinned when actions should use each person’s own account. You can mix both behaviors on one server by pinning only selected systems.
Pins reference stored credential sets; they do not copy secret values into the MCP configuration. Updating a secret inside the same credential set automatically affects later runs. The default **All Tools** server has no stored configuration and therefore cannot define server-level pins.
## Connect an MCP client
Use the endpoint shown by **Export** in the MCP Servers view:
| Server | Endpoint pattern |
| ------- | ---------------------------------------------------- |
| Default | `https://YOUR_API_ENDPOINT/mcp` |
| Custom | `https://YOUR_API_ENDPOINT/mcp/{orgId}/{serverName}` |
For self-hosted deployments, replace `YOUR_API_ENDPOINT` with that instance’s public API endpoint.
* OAuth
OAuth-capable clients need only the server URL. The client discovers the authorization flow and prompts the user to sign in:
```json
{
"mcpServers": {
"sales-assistant": {
"type": "http",
"url": "https://YOUR_API_ENDPOINT/mcp/ORG_ID/sales-assistant"
}
}
}
```
* Creator API key
Add the creator’s API key as a bearer token. Do not commit the expanded configuration to source control:
```json
{
"mcpServers": {
"sales-assistant": {
"type": "http",
"url": "https://YOUR_API_ENDPOINT/mcp/ORG_ID/sales-assistant",
"headers": {
"Authorization": "Bearer YOUR_SUPERGLUE_API_KEY"
}
}
}
}
```
MCP-triggered executions create normal superglue runs. They appear in run history and follow the same access checks as runs started from the app or API.
# Creating a System
> Let the superglue agent configure a connection and its authentication
System setup in superglue is agent-first. Tell the agent which service you want to connect and what you need to do with it. The agent configures the connection and authentication, then asks for secret values through the secure credential flow when they are required.
## Agent-first setup
1. **Describe the system:** Name the API, database, file server, or internal service and the task you want to perform.
2. **Review the connection:** The agent configures the endpoint, authentication method, and required secret names.
3. **Add credentials securely:** Enter requested secret values in the credential form rather than in chat.
4. **Test access:** The agent makes a safe test call and adjusts the configuration if needed.
## Systems and credentials
* **A system** is the reusable connection and authentication definition. It declares which secret names are required but does not contain each user’s account values.
* **A credential** is a named set of secret values bound to one system.
* **A run** uses a specifically selected credential or your default credential for that system.
One system can have multiple credentials for different users, service accounts, or customer accounts without duplicating the connection.
## Supported authentication
The agent identifies and configures the appropriate authentication method for you. superglue supports:
None
For public services or connections that handle authorization outside the request.
API keys and bearer tokens
The agent declares the required secret name and places the value in the appropriate header, query parameter, or request field at runtime.
Basic Auth
Credentials provide the username and password required for one account.
OAuth 2.0
superglue supports authorization-code and client-credentials flows, managed or custom OAuth clients, and automatic refresh for supported tokens.
Connection strings
For PostgreSQL, SQL Server, Redis, SFTP, SMB, ODBC, and custom protocols. Credentials provide account-specific values such as usernames and passwords.
## Manage credentials
After the system is saved, use its **Authentication** section to:
* Create multiple named credentials for the same system.
* Mark one credential as your default.
* Share a credential with users or roles through access rules.
* Rotate a secret value without changing the system or its tools.
Sharing a system or tool does not share a credential. Recipients need their own credential or a separate grant to an existing one.
# Creating a Tool
> Build reusable workflows that call systems, transform data, and return validated results
A tool is a reusable workflow that receives inputs, runs request or transform steps in sequence, and returns a result. Saved tools can run on demand, on a schedule, through a webhook, from the SDK, or as MCP tools.
## Build and run a tool
Agent
Describe the outcome you need. The agent selects systems, proposes the steps, tests the workflow, and lets you review it before saving.
Tool editor
Build or refine the workflow in the **Tools** area. Configure inputs, request and transform steps, test data, and the final output.
SDK or REST API
Execute a saved tool from an application or script. Tool creation and editing are usually done with the agent or tool editor.
For example, ask the agent:
```text
Create a tool that finds active Stripe customers and returns their IDs and email addresses.
```
For a multi-step workflow, describe the sequence and desired result:
```text
Find HubSpot contacts whose email domain is company.com, update their lifecycle stage to customer,
and return the contacts that were changed.
```
To execute an existing tool with the JavaScript SDK:
```bash
npm install @superglue/client
```
```typescript
import { configure, getTool, listTools, runTool } from "@superglue/client";
configure({
baseUrl: "https://api.superglue.ai/v1",
apiKey: "YOUR_API_KEY",
});
const tools = await listTools({ page: 1, limit: 50 });
const tool = await getTool("customer-sync");
const run = await runTool(tool.id, {
inputs: {
customerId: "cus_123",
},
});
console.log(tools.data);
console.log(run.status, run.data);
```
The SDK executes saved tools; it does not ask the agent to build them. A run resolves the current user’s accessible default credential for each system unless the request selects another stored credential.
## Tool anatomy
Contract
The instruction explains the tool’s purpose. The input schema describes accepted inputs, and the output schema defines the required final result.
Steps
Request steps call HTTP APIs, databases, or file servers. Transform steps reshape data without making an external request.
Output
An output transform selects and reshapes the accumulated step data before the runtime validates it against the output schema.
## How the runtime works
1. **Initialize the execution context**
Tool inputs become top-level properties of `sourceData`. Uploaded files are available through the runtime file context.
2. **Run steps in order**
Each step receives the original inputs plus results from earlier steps. Request steps resolve stored credentials only when the call executes.
3. **Store each step result under its ID**
A normal step produces one result envelope. A step whose data selector returns an array produces an array of envelopes.
4. **Build and validate the final result**
The output transform receives the complete `sourceData` object. If an output schema is configured, a mismatch fails the run.
### Request steps
A request step identifies the system and contains the protocol-specific request configuration:
```typescript
const getCustomerStep = {
id: "getCustomer",
instruction: "Fetch one Stripe customer",
config: {
type: "request",
systemId: "stripe",
method: "GET",
url: "https://api.stripe.com/v1/customers/<>",
headers: {
Authorization: "Bearer <>",
},
},
};
```
`type: "request"` is optional for stored request steps and is added during normalization. `systemId` connects the step to the system used for credential and access resolution.
For HTTP requests, `headers` and `queryParams` are objects, while `body` is a string. Encode JSON request bodies with `JSON.stringify`:
```typescript
const updateCustomerStep = {
id: "updateCustomer",
config: {
type: "request",
systemId: "stripe",
method: "POST",
url: "https://api.stripe.com/v1/customers/<>",
headers: {
Authorization: "Bearer <>",
"Content-Type": "application/json",
},
body: JSON.stringify({
metadata: {
requestedBy: "<>",
},
}),
},
};
```
### Variables and expressions
Templates support direct top-level variables and arrow-function expressions:
| Value | Syntax |
| ------------------ | ---------------------------------------------------- |
| Tool input | `<>` |
| System secret | `<>` |
| Nested step result | `<<(sourceData) => sourceData.getCustomer.data.id>>` |
| Current loop item | `<<(sourceData) => sourceData.currentItem.id>>` |
| Computed value | `<<(sourceData) => sourceData.items.length>>` |
Direct lookup works only for top-level keys. Use `(sourceData) => ...` for nested properties and computed values.
### Loops with data selectors
A data selector runs before its step. When it returns an array, the runtime executes the request once for each item and exposes that item as `sourceData.currentItem`:
```typescript
const updateCustomersStep = {
id: "updateCustomers",
dataSelector: "(sourceData) => sourceData.customerIds",
failureBehavior: "continue",
config: {
type: "request",
systemId: "crm",
method: "PATCH",
url: "https://crm.example.com/customers/<<(sourceData) => sourceData.currentItem>>",
body: JSON.stringify({ status: "active" }),
},
};
```
If a selector returns a single non-array value, the step runs once with that value as `currentItem`. Prefer a provider’s batch endpoint over a large client-side loop when one is available.
### Step result envelopes
The next step and the output transform see accumulated results in this shape:
```json
{
"getCustomer": {
"currentItem": {},
"data": {
"id": "cus_123",
"email": "ada@example.com"
},
"success": true
},
"updateCustomers": [
{
"currentItem": "cus_123",
"data": {
"status": "active"
},
"success": true
}
]
}
```
Use `.data` for a non-loop step. Loop results are arrays, so filter or map their individual envelopes.
### Transform steps
Transform steps run JavaScript without calling a system:
```typescript
const formatCustomerStep = {
id: "formatCustomer",
config: {
type: "transform",
transformCode: `(sourceData) => ({
id: sourceData.getCustomer.data.id,
email: sourceData.getCustomer.data.email.toLowerCase(),
})`,
},
};
```
Their results use the same envelope as request steps, so a later step reads `sourceData.formatCustomer.data`.
Transform steps contain `type: "transform"` and `transformCode`; they do not contain request fields such as `systemId`, `url`, `method`, `headers`, `body`, or `pagination`.
### Output transforms
The output transform receives the complete execution context and returns the tool’s public result:
```typescript
const outputTransform = `(sourceData) => {
const updates = sourceData.updateCustomers || [];
return {
updated: updates.filter((result) => result.success).map((result) => result.currentItem),
failed: updates.filter((result) => !result.success).map((result) => ({
id: result.currentItem,
error: result.error,
})),
};
}`;
```
Without an output transform or output schema, the runtime returns the last successful step’s data.
## Protocol-backed systems
Request steps select their runtime strategy from the resolved URL scheme. These steps use the same result envelopes as HTTP requests, but their JSON-encoded bodies describe queries, commands, or file operations.
PostgreSQL
`postgres://` and `postgresql://` URLs accept a body with `query` and optional `params`. Use `$1`, `$2`, and other parameter placeholders.
SQL Server and ODBC
`mssql://`, `sqlserver://`, and `odbc://` URLs accept a body with `query` and optional `params`. The configured driver determines connection behavior.
Redis
`redis://` and `rediss://` URLs accept one `{ command, args }` object or an array of commands, which runs as a pipeline.
MongoDB
`mongodb://` and `mongodb+srv://` URLs accept one operation or an array of operations. Bodies support MongoDB Extended JSON values.
FTP and SFTP
`ftp://`, `ftps://`, and `sftp://` URLs support list, get, put, delete, rename, mkdir, rmdir, exists, and stat operations.
SMB
`smb://` URLs use the same file-operation model. The URL must include a share name; credentials may also include a Windows domain.
PostgreSQL example
```typescript
const queryUsersStep = {
id: "queryUsers",
config: {
type: "request",
systemId: "warehouse",
url: "postgres://<>:<>@<>:5432/<>",
body: JSON.stringify({
query: "SELECT id, email FROM users WHERE status = $1 AND created_at > $2",
params: ["active", "<>"],
}),
},
};
```
Always parameterize user-controlled values instead of interpolating them into SQL.
Redis example
```typescript
const getUserProfileStep = {
id: "getUserProfile",
config: {
type: "request",
systemId: "redisCache",
url: "rediss://<>:<>@<>:6379/0",
body: JSON.stringify({
command: "HGETALL",
args: ["user:<>"],
}),
},
};
```
Pass an array of command objects to execute a pipeline in one round-trip.
MongoDB example
```typescript
const findUsersStep = {
id: "findUsers",
config: {
type: "request",
systemId: "mongo",
url: "mongodb://<>:<>@<>:27017/<>?authSource=admin",
body: JSON.stringify({
collection: "users",
operation: "find",
filter: { status: "active" },
options: { limit: 50, sort: { createdAt: -1 } },
}),
},
};
```
Supported operations include `find`, `findOne`, `aggregate`, `countDocuments`, `estimatedDocumentCount`, `distinct`, the insert/update/replace/delete variants, the find-and-modify variants, `bulkWrite`, and `listCollections`.
SFTP example
```typescript
const listReportsStep = {
id: "listReports",
config: {
type: "request",
systemId: "fileServer",
url: "sftp://<>:<>@<>:22/data",
body: JSON.stringify({
operation: "list",
path: "/reports",
}),
},
};
```
`get` operations parse supported file types into step data and retain the produced file for later steps. Set `outputFile: true` on a producing step when the file should become a downloadable tool output.
## Error handling
Retry eligible HTTP failures
HTTP requests retry rate limits, server errors, and selected transport failures according to the run’s retry settings. Protocol-backed database and file steps do not retry by default.
Stop or continue
A failed step stops the run by default. Set `failureBehavior: "continue"` when later steps can safely handle missing data or per-item errors.
Validate final output
`outputSchema` validates the value after the output transform. A mismatch fails the run with an output-validation error.
Keep each request step focused on one external operation, use descriptive step IDs, prefer batch endpoints over large loops, and test with production-like data before scheduling a tool.
## Input and output schemas
`inputSchema` describes the arguments a tool accepts and is used by interfaces such as MCP to validate calls. Raw REST callers should still send a conforming input object. `outputSchema` is enforced by the runtime after the output transform.
```typescript
const toolContract = {
inputSchema: {
type: "object",
properties: {
customerId: { type: "string" },
requestedBy: { type: "string" },
},
required: ["customerId"],
},
outputSchema: {
type: "object",
properties: {
id: { type: "string" },
email: { type: "string" },
},
required: ["id", "email"],
},
};
```
# Debugging a Tool
> Let the playground agent investigate failures and test focused fixes
Debugging in superglue is agent-first. Tell the playground agent what you expected, what happened instead, and which test input reproduces the problem. The agent can inspect the current draft and its latest execution results, test a focused change, and present the proposed edit for your review.
## Recommended debugging flow
1. **Set a representative input:** In **Tool Input**, enter the JSON values and bind any required files that reproduce the issue.
2. **Run the tool:** Select **Run All Steps** to execute the current draft from start to finish. The playground focuses the first failed step or the final result when execution ends.
3. **Ask the agent to investigate:** Select **Fix in chat** on a failed step or transform, or describe an incorrect result in the playground chat. Include the expected result when the run succeeds but the data is wrong.
4. **Review the proposed edit:** The agent tests its change before proposing it. Inspect the diff and accept it only when it matches your intent.
5. **Verify with the same input:** Rerun the affected step or the full tool, then save once the result is correct.
**Run All Steps** asks for confirmation before a step marked as modifying external data. Check the target system and test input before continuing.
## Inspect the test input
The **Tool Input** card contains the values used for playground runs:
* **Test Input** or **JSON & File Inputs** contains the current payload and file bindings.
* **Input Schema** defines the expected input shape. When a schema exists, superglue generates a starting payload and warns before running input that does not match it.
* Required file inputs must be bound before execution. You can still choose **Run Anyway** from the warning when intentionally testing an incomplete case.
Use stable, minimal test data while debugging. Changing the input and the tool at the same time makes it harder to tell which change fixed the problem.
## Isolate a failing step
Each step has three views:
* **Step Input** shows the evaluated `currentItem` together with payload and upstream step data. Run the preceding steps first when this input is not available yet.
* **Step Config** shows the instruction, system connection, request configuration, and optional pagination or advanced settings.
* **Step Result** shows the response data or execution error returned by that step.
Use **Run Step** to test one step without rerunning the full tool. For a loop step, **Run single iteration** tests the first item before you execute the complete loop. When a step fails, **Fix in chat** sends its error to the agent and asks it to diagnose and repair the step.
## Check the final result
The final card turns step results into the tool’s returned output:
* **Step Input** shows the data available to the final transform.
* **Transform Code** controls how that data is shaped.
* **Result Schema** optionally validates the returned structure.
* **Result** shows the transformed output or error.
Select **Transform Output** to retest only this layer after the preceding steps have completed. If it fails, use **Fix in chat** so the agent can inspect the transform error and propose a correction.
## Verify before saving
Rerun the original failing case after accepting an edit. Then test one normal case and one edge case, such as an empty response or a loop with multiple items. Save only after the final result and any external writes match what you intended.
# Deploying a Tool
> Run saved tools on a schedule, from code, through webhooks, or as MCP tools
Deploying a tool means choosing how its runs start. The tool itself stays in superglue, where the runtime resolves credentials, executes each step, records the result, and makes failures available for investigation. You do not need to ship a separate worker, queue, or cron service.
Open a saved tool and select **Deploy** to configure the same four deployment paths available throughout superglue:
[Schedule](#schedule)Run recurring work with a cron expression, timezone, and saved input.
[SDK or REST API](#sdk-or-rest-api)Start synchronous or asynchronous runs from an application, script, or agent.
[Webhooks](#webhooks)React to external events or send a completion callback when a run succeeds.
[MCP](#mcp)Expose saved tools to AI clients through the default or a scoped MCP server.
## Before you deploy
1. **Save the tool:** Deployment paths execute the saved tool, not an unsaved playground draft.
2. **Test representative input:** Run the tool from the playground and verify its final result and any external writes.
3. **Check access and credentials:** The executing identity needs access to the tool, every referenced system, and the credential selected for each system.
**Run All Steps** is for testing the current playground draft. Use **Deploy** after saving when the tool should run outside the playground.
## Schedule
Use a schedule for recurring syncs, reports, migrations, and maintenance work.
1. Open **Deploy**, choose **Schedule**, and select **Add Schedule**.
2. Choose a preset or enter a five-field cron expression, then select an IANA timezone.
3. Add the JSON input passed to every run.
4. Under **Advanced options**, optionally select credentials per system, set a run timeout, call a completion webhook, or start another tool when the run finishes.
5. Save the schedule, test it with the configured input, and enable it when ready.
Scheduled runs act as the schedule creator. A credential selected in the schedule is used for that system; systems left unpinned use the creator’s default accessible credential.
The CLI can create the same schedule:
```bash
sg schedule create \
--tool customer-sync \
--cron "0 9 * * 1-5" \
--timezone Europe/Berlin \
--payload '{"status":"active"}'
```
See [Scheduled Execution](/docs/enterprise/scheduling/) for schedule management and advanced behavior.
## SDK or REST API
Use the SDK or REST API when your application controls when a run starts. Create an API key from **API Keys** in the organization menu and store it in your application’s secret manager.
The cloud API base URL is `https://api.superglue.cloud/v1`. Enterprise and self-hosted URLs can vary; use the endpoint shown by your deployment or verify it with the superglue agent.
* TypeScript
```bash
npm install @superglue/client@latest
```
```typescript
import { configure, runTool } from "@superglue/client";
configure({
apiKey: "YOUR_SUPERGLUE_API_KEY",
baseUrl: "https://api.superglue.cloud/v1",
});
await runTool("customer-sync", {
inputs: { status: "active" },
});
```
* REST API
```bash
curl -X POST "https://api.superglue.cloud/v1/tools/customer-sync/run" \
-H "Authorization: Bearer $SUPERGLUE_API_KEY" \
-H "Content-Type: application/json" \
-d '{"inputs":{"status":"active"}}'
```
* CLI
```bash
sg tool run --tool customer-sync --payload '{"status":"active"}'
```
Runs are synchronous by default. Set `options.async` to `true` for long-running work, then use the returned run ID to monitor completion. The **SDK/API** tab in the Deploy dialog generates TypeScript, Python, and cURL examples for the current tool and input.
See the [API overview](/docs/api/overview/) for authentication and the [endpoint reference](/docs/api/endpoints/) for the complete request and response contract.
## Webhooks
Incoming webhooks start a saved tool asynchronously. The POST body becomes the tool input:
```text
POST https://api.superglue.cloud/v1/hooks/{toolId}?token={apiKey}
```
Copy the exact URL from **Deploy → Webhooks** and add it to the external service. A successful request returns `202 Accepted` with a run ID, and the resulting run appears in normal run history with webhook as its source.
The same deployment panel also shows outgoing completion callbacks. Pass an HTTPS URL as `options.webhookUrl` when starting a run, or configure it on a schedule, and superglue posts the result to that URL when the run finishes. Use `tool:{toolId}` instead to start another saved tool with the first tool’s output.
A webhook URL contains an API key in its query string. Treat the complete URL as a secret, scope the key to only the tools it needs, and rotate the key if the URL is exposed.
See [Incoming Webhooks](/docs/enterprise/webhooks/) for provider setup, completion callbacks, and tool chaining.
## MCP
Use MCP when an AI client should discover and run tools directly:
* The default `/mcp` endpoint exposes every active saved tool the authenticated identity can access.
* A custom MCP server exposes an explicit tool allowlist and can pin credentials for selected systems.
* OAuth lets each person act through their own superglue identity. Creator API key authentication is intended for trusted headless clients that act as the server creator.
The **MCP** tab in the Deploy dialog provides the default endpoint and client configuration. For a production or shared agent, create a custom server with only the tools it needs.
See [Creating an MCP Server](/docs/mcp/using-the-mcp/) for endpoint formats, authentication, RBAC, and credential pinning.
## Monitor deployed runs
Every deployment path creates a normal run record. Use **Runs** to inspect status, duration, source, step failures, and final output. For investigation from the CLI, use `sg run list` and `sg run get --full`.
# Monitoring Runs
> Monitor tool executions, inspect results, and investigate failures
Every tool execution creates a run. The **Runs** page gives you one place to monitor activity, inspect what happened, and investigate failures across your organization.
## Monitor tool activity
The table shows the operational state of each execution:
| Column | What it tells you |
| ----------- | ---------------------------------------------------------------------------------------------------------- |
| **Tool** | Which saved tool was executed |
| **Status** | Whether the run is running, successful, failed, or aborted |
| **Trigger** | Whether it came from the dashboard, agent, API, CLI, MCP, a schedule, an incoming webhook, or a tool chain |
| **User** | Who initiated the execution |
| **Started** | When execution began |
| **Runtime** | How long the execution took |
Use the status, system, trigger, and time filters to narrow the table. Search matches tool IDs, user emails, input and output values, and errors. Text search covers the most recent 30 days, including when the time filter is set to **All time**.
## Inspect results
Expand a run to inspect the complete execution context in place. The details can include:
* Run ID, trigger, timestamps, and duration
* The input passed to the tool
* Every execution step with its status, output, and error details
* The final result or failure
* Produced files and download links
This makes the run record the source of truth for both successful outputs and debugging context.
## Investigate a failure
Start with the failed step and its error details. From there you can:
* Click **Investigate** to open the agent with the run context preloaded. The agent can explain the failure and compare the saved tool with the version used for that execution.
* Click **Load Run** to open the tool editor with the same input, reproduce the behavior, and test a fix.
Runs that are still in progress can be aborted directly from the table.
## Store and manage results
Organization admins can enable **Store Run Results** under **Settings → Runs** when object storage is configured. This preserves full inputs, outputs, and step results for later inspection.
Run records do not depend on full-result storage. Admins can permanently delete run history and any stored results from Settings when required by their retention policy.
# Connecting to On-Prem Systems
> Connect agents and tools to systems inside private networks
Use the superglue Secure Gateway when an agent needs to work with a system that is reachable only from your private network. A lightweight gateway process runs inside that network and opens an outbound encrypted connection to superglue. You do not need to expose the target publicly or add inbound firewall rules.
## When to use the gateway
The gateway is intended for systems such as:
* Internal APIs and legacy applications behind a corporate firewall.
* PostgreSQL, SQL Server, Redis, or MongoDB instances in private subnets.
* SFTP servers and Windows file shares that are available only on the local network.
* Services inside a private cloud VPC or Kubernetes network.
Once connected, a private system behaves like any other superglue system: agents can configure its authentication and tools can read or write data through it.
## How the connection works
1. The gateway connects to superglue over WebSocket Secure using an API key.
2. It registers only the target aliases listed in its configuration.
3. You create a **Private System** and select one connected gateway and target.
4. When an agent or tool calls that system, superglue opens a tunnel to the selected target for the request.
The gateway needs network access to its configured targets and outbound access to the configured WebSocket endpoint. Hosted superglue uses port `443`. The gateway does not listen for inbound internet traffic.
## Set up the gateway
### 1. Create an API key
Open **API Keys** from your organization menu, select **New API Key**, and copy the value into the gateway configuration. Use a separate, clearly named key for each gateway deployment.
Treat the gateway API key as a secret. Do not commit `config.yaml`, and rotate the key if it is exposed.
### 2. Download the gateway
Check the architecture of the host that will run inside your private network:
```bash
uname -m
```
Linux x86\_64
```bash
curl -L https://downloads.superglue.cloud/superglue-gateway-linux-x86_64 -o superglue-gateway
chmod +x superglue-gateway
```
Linux arm64
```bash
curl -L https://downloads.superglue.cloud/superglue-gateway-linux-arm64 -o superglue-gateway
chmod +x superglue-gateway
```
Windows x86\_64
```powershell
Invoke-WebRequest -Uri https://downloads.superglue.cloud/superglue-gateway-windows.exe -OutFile superglue-gateway.exe
```
### 3. Configure allowed targets
Create `config.yaml` next to the executable:
```yaml
tunnel_id: "berlin-office"
server_url: "wss://api.superglue.cloud/ws/tunnels"
api_key: "sg_your_api_key"
targets:
internal-api: "api.internal.example.com:443"
finance-db: "10.20.0.15:5432"
files: "10.20.0.30:445"
```
Each entry exposes one named destination through the gateway as a plain `host:port` address. The protocol is set later by the system URL in superglue, not by the gateway configuration. One gateway can register multiple targets, but it cannot reach destinations that are not explicitly listed. For HTTPS and other TLS destinations, use the target’s real hostname instead of an IP address; the gateway uses it to establish the TLS connection.
For a self-hosted deployment, replace `server_url` with your superglue API WebSocket endpoint ending in `/ws/tunnels`.
### 4. Start the gateway
```bash
./superglue-gateway -config /path/to/config.yaml
```
On Windows, run `.\superglue-gateway.exe -config C:\path\to\config.yaml`. If `config.yaml` is next to the executable, the `-config` argument is optional. A successful startup logs **Connected to server** and then **Registration sent, waiting for tunnel requests**. The process reconnects automatically when its control connection drops.
### Enable the script runner (optional)
Some integrations drive a local automation interface on the gateway host rather than a network target. To allow this, add one line to `config.yaml`:
```yaml
enable_script_runner: true
```
When enabled, the gateway registers a built-in target named `runner` and accepts scripts sent from superglue over the tunnel (the `script://` protocol, e.g. a system URL of `script://runner/vbs32`). No `targets` entry is needed for it. The runner is Windows-only and is reachable only through the tunnel, never from the host.
The script runner executes code sent from superglue on the gateway host, so it is off by default. Enable it only on a gateway you intend to use for a script-based integration.
## Connect the private system
1. Open **Systems** and select **Add System**.
2. Choose **Private System**.
3. Select the connected gateway and one of its registered targets.
4. Confirm the system name and URL.
5. Create the system, then let the system agent configure authentication for you.
The URL hostname must exactly match the target alias, and the URL scheme selects the protocol. For example, the `finance-db` target above could use `postgres://finance-db:5432/accounting`, and the `internal-api` target could use `https://internal-api/reports`. Enter requested secret values through the secure credential form rather than placing them in the gateway configuration or agent chat.
## Run it reliably
For persistent use, run the gateway under your existing service manager, container platform, or workload orchestrator. Configure automatic restart and give the process only the network access it needs:
* Outbound access to the configured superglue WebSocket endpoint (`443` for hosted superglue).
* Access from the gateway host to the specific target hosts and ports.
* Read access to `config.yaml`, with the file restricted to the service account.
* No inbound public listener or broad access to the surrounding private network.
## Troubleshooting
The gateway does not appear in superglue
Confirm that the process reports a successful connection and registration. Then check the API key, `server_url`, outbound WebSocket access (`443` for hosted superglue), and that the key belongs to the expected organization.
The gateway connects but the target call fails
Test the target from the gateway host, verify its firewall or security-group rules, and confirm that the system URL hostname matches the configured target alias. Run the gateway with `-debug` for connection details.
```bash
./superglue-gateway -config /path/to/config.yaml -debug
```
The connection drops repeatedly
Check the gateway logs and the network path to the superglue API. Proxies and firewalls must allow long-lived outbound WebSocket connections; the gateway automatically retries every five seconds after a disconnect.
# Verifying User Identity
> Prove which user triggered a superglue request using the signed sg_auth_jwt token
When a superglue tool calls your API, you sometimes need to know which user triggered the run, and you need proof, not just a header anyone could set. superglue provides two runtime variables for this:
* `<>`: the plaintext email of the user who triggered the run. Simple, but spoofable by anyone who can send you an HTTP request.
* `<>`: a short-lived JWT signed by superglue that encodes the triggering user’s identity. Your endpoint verifies the signature against superglue’s public keys, giving you cryptographic proof.
Both resolve automatically at execution time. In scheduled runs they resolve to the schedule creator.
## Using sg\_auth\_jwt in a tool
Reference the variable anywhere in a step config, typically a header:
```plaintext
Authorization: Bearer <>
```
or
```plaintext
X-Superglue-User: <>
```
The token is only minted when a tool actually references it. If the run has no associated user (for example an org-level API key), the run fails with a resolution error telling you to run the tool as a signed-in user or with a user-linked API key.
## Token contents
The token is an EdDSA-signed JWT with these claims:
| Claim | Value |
| ----------- | ------------------------------------------------- |
| `iss` | The superglue web app origin |
| `sub` | The superglue user id of the triggering user |
| `email` | The user’s email |
| `orgId` | The organization the run executed in |
| `token_use` | Always `"sg_outbound_identity"` |
| `iat`/`exp` | Issued-at and expiry; tokens are valid for 1 hour |
## Verifying the token
Outbound identity tokens are signed with a dedicated keypair, separate from superglue’s session keys. Fetch the public key from the outbound JWKS endpoint on the web app origin (`https://app.superglue.cloud/api/auth/outbound-jwks` on superglue Cloud, or your own deployment’s app URL when self-hosting), then verify:
1. The signature, against the JWKS
2. `exp` (not expired)
3. `iss` equals the superglue origin you expect
4. `token_use` equals `"sg_outbound_identity"` (required)
With [jose](https://github.com/panva/jose):
```ts
import { createRemoteJWKSet, jwtVerify } from "jose";
const jwks = createRemoteJWKSet(new URL("https://app.superglue.cloud/api/auth/outbound-jwks"));
const { payload } = await jwtVerify(token, jwks, {
issuer: "https://app.superglue.cloud",
});
if (payload.token_use !== "sg_outbound_identity") {
throw new Error("Not a superglue outbound identity token");
}
// payload.sub, payload.email, payload.orgId identify the triggering user
```
The token is a real identity assertion: anyone holding it can prove “this user triggered a superglue request” for up to an hour. Only send it to endpoints you trust, the same caveat as any bearer credential. It proves who triggered the request, but it is not bound to the request method, URL, or body.
# Overview
> Connect to and authenticate with the superglue REST API.
The superglue REST API lets services, scripts, and agents manage resources and execute tools programmatically.
## API endpoint
The cloud-hosted API endpoint is `https://api.superglue.cloud`. REST routes are versioned under `/v1`, so direct API requests use this base URL:
```text
https://api.superglue.cloud/v1
```
Enterprise and self-hosted API URLs may vary. Ask your superglue agent to confirm the API endpoint configured for your deployment before integrating.
## Authentication
Open **API Keys** from your organization menu, create an API key, and send it as a bearer token with every request:
```bash
curl "https://api.superglue.cloud/v1/tools" \
-H "Authorization: Bearer YOUR_API_KEY"
```
Treat API keys as secrets. Keep them out of client-side code, source control, and query parameters.
Webhook providers that cannot set an `Authorization` header may instead use the `token` query parameter on `/hooks/{toolId}`. In that case, treat the complete webhook URL as a secret.
## OpenAPI specification
The [OpenAPI specification](/openapi.yaml) is the source of truth for the [Endpoints reference](/docs/api/endpoints/) and generated SDK clients. You can also import it into any OpenAPI-compatible client or code generator.
# Endpoints
> Interactive REST API endpoint reference for superglue.
[superglue API endpoints](/docs/api-embed)
# Overview
> Install and authenticate the superglue CLI
The superglue CLI (`sg`) lets you manage systems, build and run tools, create MCP servers, and inspect runs from a terminal or AI coding agent.
## Install
```bash
npm install -g @superglue/cli@latest
sg --version
```
Use `sg update --check` later to check whether a newer version is available.
## Authenticate
### Browser login
For local, interactive use, sign in through your superglue account:
```bash
sg login
sg whoami
```
`sg login` opens the web app and stores an OAuth session in `~/.superglue/auth.json`. Run `sg logout` to remove it.
For a self-hosted or custom deployment, provide the API and web app endpoints:
```bash
sg --endpoint "https://api.example.com" login \
--web-endpoint "https://app.example.com" \
--save-config
```
### API key
For CI, servers, and other non-interactive environments, configure an API key instead:
```bash
export SUPERGLUE_API_KEY="your-api-key"
export SUPERGLUE_API_ENDPOINT="https://api.superglue.cloud"
sg whoami
```
`SUPERGLUE_API_ENDPOINT` is optional for superglue Cloud and required when the CLI should target another instance. Per-command `--api-key` and `--endpoint` flags override stored configuration and environment variables.
`sg init` remains available for scripts that use its legacy API-key setup flow. New interactive setups should use `sg login`; new headless setups should use environment variables or global flags.
## Use the CLI with an AI agent
Start with [CLI + Skills](/docs/getting-started/cli-skills/) when using `sg` through Cursor, Claude Code, Codex, or another coding agent. It covers installing the bundled superglue skill, adding project context, and the discovery workflow agents should follow before changing systems or tools.
## Output and help
Commands return JSON by default. Add `--table` for human-readable tables or `--full` to disable truncation of large fields.
Use the built-in help for the installed version:
```bash
sg --help
sg tool --help
sg tool run --help
```
See the [commands reference](/docs/cli/commands/) for every command and flag.
# Commands
> Complete reference for all CLI commands and flags
The CLI outputs JSON by default. These global flags can be placed before a command:
| Flag | Description |
| ------------------ | ------------------------------------------- |
| `--api-key ` | Override the API key for headless auth |
| `--endpoint ` | Override the superglue API endpoint |
| `--table` | Human-readable table output (default: JSON) |
| `--full` | Disable truncation of large fields |
Run `sg --help` to inspect the exact interface installed locally.
## Authentication
### sg login
Authenticate the CLI through the browser. Stores an OAuth session in `~/.superglue/auth.json`.
```bash
sg login
sg login --no-browser
sg login --save-config --global
```
| Flag | Description |
| ---------------------- | ---------------------------------------------------------- |
| `--web-endpoint ` | superglue web app endpoint |
| `--no-browser` | Print the login URL instead of opening a browser |
| `--save-config` | Persist endpoint settings to `config.json` |
| `--global` | Save endpoint config globally (`~/.superglue/config.json`) |
### sg logout
Remove the stored OAuth session from `~/.superglue/auth.json`.
```bash
sg logout
```
No flags.
### sg whoami
Show the authenticated user and organization.
```bash
sg whoami
```
No flags.
## sg init
Legacy API-key setup for headless environments. Prefer `sg login`.
```bash
sg init
```
| Flag | Description |
| ---------------------- | -------------------------------------------------------------------- |
| `--web-endpoint ` | Web endpoint for OAuth callbacks |
| `--output-mode ` | `stdout` or `stdout+file` (default: `stdout`) |
| `--output-dir ` | Output directory for stdout+file mode (default: `.superglue/output`) |
| `--global` | Save config globally (`~/.superglue/`) instead of locally |
| `--preset ` | `runner`, `builder`, or `admin` (default: `admin`) |
## sg update
Update the CLI to the latest version.
```bash
sg update
sg update --check
```
| Flag | Description |
| --------- | ----------------------------------------- |
| `--check` | Only check for updates without installing |
## sg skill
Print the skill reference (`SKILL.md`) for AI agents, or a specific topic reference.
```bash
sg skill
sg skill postgres
sg skill integration
```
Takes an optional positional `topic` argument. Available topics: `superglue-info`, `integration`, `http`, `graphql`, `postgres`, `mssql`, `odbc`, `redis`, `mongodb`, `sftp-smb`, `file-handling`, `access-rules`.
## Tool commands
### sg tool build
Build a new tool from a config file or individual flags.
```bash
sg tool build --config tool.json
sg tool build --id my-tool --instruction "Fetch user data" --steps steps.json
```
| Flag | Description |
| --------------------------- | -------------------------------- |
| `--config ` | JSON config file or inline JSON |
| `--id ` | Tool ID (kebab-case) |
| `--instruction ` | Human-readable tool instruction |
| `--steps ` | JSON file containing steps array |
| `--output-transform ` | JS output transform function |
| `--output-schema ` | JSON file for output schema |
| `--payload ` | Sample payload JSON |
| `--file ` | File reference (repeatable) |
Provide either `--config` or `--id` + `--instruction` + `--steps`.
### sg tool run
Execute a draft, saved tool, or inline config.
```bash
sg tool run --tool my-tool --payload '{"userId": "123"}'
sg tool run --draft abc123
sg tool run --config '{"id":"inline","instruction":"...","steps":[...]}'
sg tool run --config-file tool.json --payload-file payload.json
```
| Flag | Description |
| ------------------------ | ----------------------------------- |
| `--tool ` | Saved tool ID |
| `--draft ` | Draft ID from build |
| `--config ` | Inline tool config JSON |
| `--config-file ` | Tool config JSON file |
| `--payload ` | JSON payload |
| `--payload-file ` | JSON payload file |
| `--file ` | File reference (repeatable) |
| `--include-step-results` | Include raw step results in output |
| `--include-config` | Include full tool config in output |
| `--timeout ` | Per-request timeout; minimum 1000ms |
Exactly one of `--tool`, `--draft`, `--config`, or `--config-file` is required.
### sg tool edit
Edit a tool or draft using JSON Patch operations ([RFC 6902](https://datatracker.ietf.org/doc/html/rfc6902)).
```bash
sg tool edit --tool my-tool --patches '[{"op":"replace","path":"/instruction","value":"New instruction"}]'
sg tool edit --draft abc123 --patches patches.json
```
| Flag | Description |
| -------------------------- | ----------------------------------------------------- |
| `--tool ` | Saved tool ID |
| `--draft ` | Draft ID |
| `--patches ` | JSON Patch array (inline or file path) — **required** |
One of `--tool` or `--draft` is required. Editing a saved tool creates a new draft.
### sg tool save
Persist a draft to the server.
```bash
sg tool save --draft abc123
sg tool save --draft abc123 --id custom-tool-id
```
| Flag | Description |
| ----------------- | -------------------------------------------------------------- |
| `--draft ` | Draft ID — **required** |
| `--id ` | Custom ID for the saved tool (defaults to the draft’s tool ID) |
### sg tool list
List all saved tools.
```bash
sg tool list
sg tool list --limit 50 --offset 50
```
| Flag | Description |
| -------------- | --------------------------------------- |
| `--limit ` | Max results (default: `25`, max: `100`) |
| `--offset ` | Skip the first N results (default: `0`) |
### sg tool find
Search tools by query or look up by exact ID.
```bash
sg tool find "user data"
sg tool find --id my-tool
sg tool find --id my-tool --fields instruction,inputSchema
sg tool find
```
| Flag | Description |
| ------------------- | ------------------------------------------------------------ |
| `--id ` | Exact tool ID lookup |
| `--fields ` | Comma-separated top-level fields to return (requires `--id`) |
When called with no arguments or `*`, lists all tools. Otherwise performs a keyword search across tool IDs, names, and instructions.
## System commands
### sg system create
Create a new system.
```bash
sg system create --config system.json
sg system create --name "My API" --url https://api.example.com --credentials '{"apiVersion":"v2"}'
sg system create --name "My API" --template stripe
```
| Flag | Description |
| ------------------------- | ---------------------------------------------------------------------------------------------- |
| `--config ` | JSON config file |
| `--id ` | System ID (derived from `--name` if omitted) |
| `--name ` | Human-readable name — **required** unless using `--config` or `--template` |
| `--url ` | API URL — **required** unless using `--config` or `--template` |
| `--template ` | Template ID — auto-fills URL, OAuth config, and credentials. Auto-detected from URL if omitted |
| `--instructions ` | Specific instructions |
| `--credentials ` | Credentials JSON, including secret values when needed |
| `--authentication ` | Authentication config JSON |
| `--docs-url ` | Documentation URL to scrape after creation |
| `--openapi-url ` | OpenAPI spec URL to fetch after creation |
`--name` and `--url` must be present in the system definition — provide them as flags, include them in `--config`, or let `--template` auto-fill both. `--id` is derived from `--name` if omitted.
To categorize a system, include a `tags` string array in the JSON passed with `--config`. Tags are metadata only; commands always use the exact system ID.
### sg system edit
Edit an existing system.
```bash
sg system edit --id my-api --url https://api-v2.example.com
sg system edit --id my-api --credentials '{"api_key":"new-key"}'
sg system edit --id my-api --scrape-url https://docs.example.com --scrape-keywords "auth endpoints"
```
| Flag | Description |
| ------------------------------ | ------------------------------- |
| `--id ` | System ID — **required** |
| `--name ` | New name |
| `--url ` | New URL |
| `--instructions ` | New instructions |
| `--credentials ` | Credentials JSON to merge |
| `--authentication ` | Authentication config JSON |
| `--scrape-url ` | Documentation URL to scrape |
| `--scrape-keywords ` | Space-separated scrape keywords |
### sg system list
List all systems.
```bash
sg system list
```
| Flag | Description |
| -------------- | --------------------------------------- |
| `--limit ` | Max results (default: `25`) |
| `--offset ` | Skip the first N results (default: `0`) |
### sg system find
Search systems by query or look up by exact ID.
```bash
sg system find "payment"
sg system find --id my-api
```
| Flag | Description |
| ---------------- | ---------------------- |
| `--id ` | Exact system ID lookup |
### sg system call
Make an authenticated call through a system (HTTP API, database, or file server).
```bash
sg system call --url https://api.example.com/users --system-id my-api
sg system call --url https://api.example.com/users --method POST --body '{"name":"Jane"}' --system-id my-api
sg system call --url postgres://host/db --system-id my-db --body '{"query":"SELECT * FROM users LIMIT 5"}'
```
| Flag | Description |
| --------------------- | ------------------------------------------------------------- |
| `--url ` | Full URL including protocol — **required** |
| `--system-id ` | System ID for credential injection |
| `--method ` | HTTP method (default: `GET`) |
| `--headers ` | HTTP headers JSON |
| `--body ` | Request body |
| `--timeout ` | Per-request timeout; minimum 1000ms |
| `--file ` | File reference (repeatable) |
| `--continue-on-error` | Return a failed response envelope instead of exiting non-zero |
### sg system credentials
Manage the current user’s credential set for a system.
```bash
sg system credentials get --system-id my-api
sg system credentials set --system-id my-api --credentials '{"api_key":"sk-..."}'
sg system credentials clear --system-id my-api
```
| Subcommand | Description |
| ---------- | --------------------------------------------------------------------------------------- |
| `get` | List secret names, whether each has a value, and the corresponding runtime placeholders |
| `set` | Set the current user’s secret values from `--credentials ` (**required**) |
| `clear` | Clear the current user’s credential set for the system |
`get` never returns secret values.
Common flags:
| Flag | Description |
| ------------------ | ------------------------ |
| `--system-id ` | System ID — **required** |
### sg system search-docs
Search a system’s scraped documentation.
```bash
sg system search-docs --system-id my-api --keywords "authentication oauth"
```
| Flag | Description |
| --------------------------- | ------------------------------ |
| `--system-id ` | System ID — **required** |
| `-k, --keywords ` | Search keywords — **required** |
### sg system oauth
Authenticate a system via OAuth.
```bash
sg system oauth --system-id my-api --scopes "read write"
sg system oauth --system-id my-api --scopes "read" --grant-type client_credentials
```
| Flag | Description |
| --------------------- | --------------------------------------------------------------- |
| `--system-id ` | System ID — **required** |
| `--scopes ` | Space-separated OAuth scopes; defaults to system/template value |
| `--auth-url ` | OAuth authorization URL (defaults to system/template value) |
| `--token-url ` | OAuth token URL (defaults to system/template value) |
| `--grant-type ` | `authorization_code` (default) or `client_credentials` |
## MCP commands
Manage named MCP servers that expose selected saved tools.
### sg mcp list
List named MCP servers.
```bash
sg mcp list
```
| Flag | Description |
| -------------- | --------------------------------------- |
| `--limit ` | Max results (default: `25`) |
| `--offset ` | Skip the first N results (default: `0`) |
### sg mcp find
Search MCP servers by query, name, or exact ID.
```bash
sg mcp find "sales"
sg mcp find --id server_abc123
sg mcp find --name sales-tools
```
| Flag | Description |
| --------------------- | ---------------------------- |
| `--id ` | Exact MCP server ID lookup |
| `--name ` | Exact MCP server name lookup |
### sg mcp create
Create a named MCP server for selected saved tools.
```bash
sg mcp create --name sales-tools --tool get_customer --tool create_invoice
sg mcp create --name sales-tools --tools get_customer,create_invoice --auth-mode oauth
sg mcp create --config mcp-server.json
```
| Flag | Description |
| ------------------------- | ---------------------------------------- |
| `--config ` | MCP server config file or inline JSON |
| `--name ` | URL-safe server name |
| `--display-name ` | Human-readable display name |
| `--description ` | Description |
| `--auth-mode ` | `oauth` (default) or `creator_api_key` |
| `--tool ` | Saved tool ID to expose (repeatable) |
| `--tools ` | Comma-separated saved tool IDs to expose |
### sg mcp edit
Edit a named MCP server.
```bash
sg mcp edit --id server_abc123 --add-tool refund_invoice
sg mcp edit --id server_abc123 --remove-tool create_invoice
sg mcp edit --id server_abc123 --tools get_customer,create_invoice
```
| Flag | Description |
| ------------------------- | --------------------------------------------- |
| `--id ` | MCP server ID — **required** |
| `--config ` | Partial MCP server config file or inline JSON |
| `--name ` | New URL-safe server name |
| `--display-name ` | New human-readable display name |
| `--clear-display-name` | Clear the display name |
| `--description ` | New description |
| `--clear-description` | Clear the description |
| `--auth-mode ` | `oauth` or `creator_api_key` |
| `--tool ` | Replacement saved tool ID (repeatable) |
| `--tools ` | Replacement comma-separated saved tool IDs |
| `--add-tool ` | Add a saved tool ID (repeatable) |
| `--remove-tool ` | Remove a saved tool ID (repeatable) |
## Schedule commands
Manage cron schedules for saved tools.
### sg schedule list
List tool schedules.
```bash
sg schedule list
sg schedule list --tool my-tool --status active
```
| Flag | Description |
| ------------------- | ----------------------------------------------------------------- |
| `--tool ` | Filter by tool ID |
| `--status ` | Filter by status: `active`, `inactive`, or `all` (default: `all`) |
| `--limit ` | Max results (default: `25`) |
| `--offset ` | Skip the first N results (default: `0`) |
### sg schedule create
Create a schedule for a saved tool.
```bash
sg schedule create --tool my-tool --cron "0 9 * * *" --timezone Europe/Berlin
sg schedule create --tool my-tool --cron "0 * * * *" --timezone UTC --payload '{"limit":100}'
```
| Flag | Description |
| -------------------------- | ---------------------------------------------------------- |
| `--tool ` | Saved tool ID to schedule — **required** |
| `--cron ` | 5-field cron expression — **required** |
| `--timezone ` | IANA timezone (e.g. `UTC`, `Europe/Berlin`) — **required** |
| `--disabled` | Create the schedule disabled |
| `--payload ` | JSON object payload passed to each scheduled run |
| `--payload-file ` | JSON file payload passed to each scheduled run |
| `--options ` | Request options JSON object or file path |
| `--options-file ` | Request options JSON file |
| `--webhook-url ` | Webhook URL called after successful execution |
| `--tool-chain ` | Tool ID to run after successful execution |
| `--retries ` | Retry count, 0-10 |
| `--timeout ` | Request timeout in milliseconds |
### sg schedule edit
Edit, enable, or disable an existing schedule.
```bash
sg schedule edit --tool my-tool --id sched_abc123 --disabled
sg schedule edit --tool my-tool --id sched_abc123 --cron "0 12 * * *"
```
| Flag | Description |
| -------------------------- | ----------------------------------------------------- |
| `--tool ` | Saved tool ID that owns the schedule — **required** |
| `--id ` | Schedule ID — **required** |
| `--cron ` | New 5-field cron expression |
| `--timezone ` | New IANA timezone |
| `--enabled` | Enable the schedule |
| `--disabled` | Disable the schedule |
| `--payload ` | Replacement JSON object payload |
| `--payload-file ` | Replacement JSON payload file |
| `--options ` | Replacement request options JSON object or file path |
| `--options-file ` | Replacement request options JSON file |
| `--clear-options` | Replace request options with an empty object |
| `--webhook-url ` | Set webhook URL called after successful execution |
| `--tool-chain ` | Set tool ID to run after successful execution |
| `--clear-webhook` | Remove webhook/tool-chain success action from options |
| `--retries ` | Set retry count, 0-10 |
| `--timeout ` | Set request timeout in milliseconds |
## Run commands
### sg run list
List recent tool execution runs.
```bash
sg run list
sg run list --tool my-tool --status success --limit 20
sg run list --source cli,sdk --user user_123
```
| Flag | Description |
| -------------------- | ----------------------------------------------------------- |
| `--tool ` | Filter by tool ID |
| `--status ` | Filter by status: `running`, `success`, `failed`, `aborted` |
| `--source ` | Comma-separated request sources |
| `--user ` | Filter by user ID |
| `--system-id ` | Filter by system ID |
| `--limit ` | Max results (default: `10`, max: `50`) |
| `--offset ` | Skip the first N results (default: `0`) |
### sg run get
Get details of a specific run.
```bash
sg run get run_abc123
sg run get run_abc123 --fetch-results
```
Takes a positional `runId` argument.
| Flag | Description |
| ----------------- | ---------------------------------------------- |
| `--fetch-results` | Include complete run data (alias for `--full`) |
### sg run download
Download file artifacts produced by a run.
```bash
sg run download run_abc123
sg run download run_abc123 report.csv --output-dir ./downloads
```
Takes a positional `runId` and an optional `fileKey` argument.
| Flag | Description |
| --------------------- | ------------------------------- |
| `--output-dir ` | Target directory (default: `.`) |
# Cloud Networking
> Outbound IPs and networking details for superglue Cloud
superglue Cloud uses fixed outbound IP addresses for connections to external systems.
## Outbound IPs
If your system requires IP allowlisting for firewall rules, security groups, or vendor access controls, allow outbound requests from superglue Cloud from:
* `34.234.12.178`
* `18.198.191.215`
These IPs apply to superglue Cloud. Self-hosted and enterprise deployments use their own deployment-specific networking configuration.
# Scheduled Execution
> Run saved tools automatically with cron-based schedules
**Cloud feature** — Scheduled execution is available on superglue Cloud and is not available in the open-source version.
Schedules run saved tools automatically using a five-field cron expression and an IANA timezone. Every scheduled execution creates a run that you can inspect from **Runs**.
## Create a schedule
1. **Open the deployment dialog**
Open a saved tool, click **Deploy**, select **Schedule**, and click **Add Schedule**.
2. **Choose the frequency and timezone**
Select a preset or choose **Custom cron**. The available presets include every 5 minutes, every 30 minutes, hourly, daily, weekly, and monthly.
Common custom expressions:
* `*/5 * * * *` — Every 5 minutes
* `0 9 * * 1-5` — Weekdays at 9:00
* `0 */6 * * *` — Every 6 hours
* `0 0 1 * *` — First day of every month
The selected timezone determines when the cron expression is evaluated. Use [crontab.guru](https://crontab.guru) to check an expression.
3. **Add the JSON input**
Optionally provide the payload passed to every run. The editor validates that the value is valid JSON.
4. **Configure advanced options**
* **Completion action:** Call an HTTP webhook or start another saved tool when the run completes.
* **Credentials:** Pin an accessible credential set for each system used by the tool, or keep the user’s default.
* **Run timeout:** Set the maximum duration in seconds, or leave it empty to use the deployment default.
5. **Save the schedule**
Click **Add Schedule**. New schedules are enabled by default and receive their next run time immediately.
## Manage and test schedules
The Schedule tab shows the human-readable frequency, next run, completion action, and current status. From there you can:
* Run an immediate **Test** using the schedule’s payload, credentials, timeout, and completion action
* Edit the frequency, timezone, payload, or advanced options
* Enable or disable future executions
* Delete the schedule permanently
Disabling a schedule preserves it without claiming future runs. Deleting it removes the schedule but does not delete existing run history.
## Execution behavior
* Scheduled runs use the `scheduler` request source and appear in **Runs**.
* A schedule executes with the access of the user who created it. Pinned credentials must remain accessible to that user.
* Archiving a tool disables its schedules. Deleting a tool deletes its schedules.
* Failures are recorded like any other run and can trigger configured notifications.
Schedules can also be created and managed through the [CLI schedule commands](/docs/cli/commands/#schedule-commands) or REST API.
# Incoming Webhooks
> Trigger saved tools from external HTTP services
**Cloud feature** — Incoming webhooks are available on superglue Cloud and are not available in the open-source version.
Incoming webhooks let Stripe, GitHub, Shopify, and other HTTP services start a saved tool. The JSON request body becomes the tool input, and superglue returns immediately while the tool runs in the background.
## Set up an incoming webhook
1. **Copy the webhook URL**
Open a saved tool, click **Deploy**, and select **Webhooks**. The generated URL follows this format:
```text
https://api.superglue.cloud/v1/hooks/{toolId}?token={apiKey}
```
2. **Create a restricted API key**
Create an API key and grant it access only to the tools the external service should be able to execute. The key in the webhook URL is a secret.
3. **Configure the external service**
Add the URL to the service’s webhook settings and select the events that should trigger the tool.
4. **Design the tool for the payload**
The request body is passed through unchanged. For example, this request makes `data.object.email` available to the tool input:
```bash
curl -X POST "https://api.superglue.cloud/v1/hooks/handle-customer?token=$SUPERGLUE_API_KEY" \
-H "Content-Type: application/json" \
-d '{
"id": "evt_1234",
"type": "customer.created",
"data": { "object": { "email": "user@example.com" } }
}'
```
5. **Review the run**
A valid trigger returns `202 Accepted` with the `runId`, `toolId`, and an `accepted` status. The run appears with the `webhook` request source in **Runs** and under **Recent webhook requests** for the tool.
## Authentication
Webhook requests support either an API key in the `token` query parameter or the standard header:
```http
Authorization: Bearer YOUR_API_KEY
```
Query authentication is useful for providers that cannot set custom headers. Header authentication avoids placing the key in a URL. In either case, the key must be allowed to execute the requested tool.
## Challenge verification
The endpoint handles several common provider verification flows before starting a tool:
| Provider pattern | Request | Response |
| ------------------- | ------------------------------------------------- | ------------------------------- |
| Slack or monday.com | POST body with `challenge` | Echoes `{ "challenge": "..." }` |
| Meta or WhatsApp | GET with `hub.mode=subscribe` and `hub.challenge` | Echoes `hub.challenge` as text |
| Microsoft Graph | GET with `validationToken` | Echoes the token as text |
| Generic or Nylas | GET with `challenge` | Echoes the challenge as text |
GET requests only perform challenge verification; they never execute a tool.
## Security
* Treat webhook URLs as secrets and rotate the associated API key if a URL is exposed.
* Use a restricted API key scoped to the receiving tool.
* superglue authenticates the request but does not validate provider-specific HMAC signatures. Put a signature-verifying proxy in front of the webhook when a provider requires cryptographic verification.
* Filter the provider event type in the tool when several event types share one endpoint.
## Incoming versus completion webhooks
An incoming webhook starts a tool through `/v1/hooks/{toolId}`. A completion webhook is different: pass `options.webhookUrl` when running a tool and superglue sends the run ID, success state, output or error, and file metadata to that URL after execution finishes. Both examples are available from **Deploy → Webhooks**.
# Notifications
> Send Slack and email alerts for tool runs
**Cloud feature** — Notifications are available on superglue Cloud and are not available in the open-source version.
Notifications send real-time failure alerts or scheduled run summaries to Slack and email. Organization admins configure them under [Settings](https://app.superglue.cloud/settings).
## Configure a channel
1. **Choose Slack or email**
Add either channel independently. Each channel has its own connection, rules, and delivery state.
2. **Configure delivery**
Enter the Slack credentials or email recipients, then save the channel.
3. **Send a test**
Use the test action to confirm that the destination can receive notifications.
4. **Create rules**
Choose real-time failure alerts, daily summaries, weekly summaries, or a custom combination of trigger sources and tool filters.
* Slack
Slack supports two authentication methods:
| Method | Use when |
| -------------------- | --------------------------------------------------------------- |
| **Incoming webhook** | A single fixed Slack channel is enough |
| **Bot token** | You need to select channels or post to multiple public channels |
Bot-token setup requires a token beginning with `xoxb-` and a channel ID. Private channels must invite the bot before it can post.
Slack messages include **View Details** and **Investigate Failure** actions when an app URL is available.
* Email
Add one or more recipients and, optionally, a custom from address. Email alerts contain the tool, run status, run ID, trigger source, timestamp, error, and failed step. They also link back to the run when an app URL is available.
## Notification rules
Rules are configured separately for each channel.
### Delivery modes
| Mode | Behavior |
| ------------------ | -------------------------------------------------------- |
| **On failure** | Sends a real-time alert when a matching run fails |
| **Daily summary** | Sends the previous day’s results at 09:00 UTC |
| **Weekly summary** | Sends the previous week’s results on Monday at 09:00 UTC |
Summaries include successful and failed run counts by tool and are skipped when the period has no runs.
### Filters
Real-time rules can filter by:
* Trigger source
* Exact tool ID or a glob pattern such as `finance-*` or `*-sync`
Runtime notifications are sent for API, scheduler, incoming-webhook, CLI, and tool-chain runs. Manual dashboard, agent, and MCP runs are excluded from automatic failure notifications.
## Delivery failures
Each channel tracks consecutive delivery failures. After three failures, superglue disables that channel to prevent repeated failed deliveries. Correct the connection details, send another test, and re-enable the channel.
# Tool Version History
> Review saved tool changes and restore previous versions
**Cloud feature** — Tool version history is available on superglue Cloud. It is not available in the open-source version.
superglue keeps a version history for saved tools. Each save that changes a tool archives the previous configuration before writing the new one.
## View version history
Open a saved tool and click the current version badge, such as `v3`, beside the tool instruction. The history panel shows:
* The current saved version
* Earlier versions in reverse chronological order
* When each version was saved and who saved it
* A summary of the changes from the preceding version
* An expandable field-level diff
Unsaved draft changes can also appear above the saved history, but they do not create a persisted version until the tool is saved.
## Restore a version
Expand a historical version, review its changes, and click **Restore**. Restoring requires edit access to the tool.
Before replacing the current tool, superglue archives the current configuration as a new history entry. Restoring an older version therefore does not discard the version you restored from.
Only saves with actual configuration changes create archived versions. Renaming a tool preserves its history; deleting a tool removes its version history.
# Role-Based Access Control
> Control who can view, use, edit, and share organization resources
**Enterprise feature** — RBAC is available on superglue Enterprise plans. [Contact us](https://cal.com/superglue/superglue-demo) to learn more.
superglue RBAC controls which organization resources each user can access and what they can do with them. The same access rules apply across the dashboard, agent, API, SDKs, schedules, and MCP servers.
## superglue RBAC fundamentals
superglue uses an allowlist model based on resource grants. A user can access a resource when at least one grant gives them the required permission. Grants can cover a specific resource or all current and future resources of one type.
The resources governed by RBAC are:
| Resource | What access controls |
| --------------- | --------------------------------------------------------------------- |
| **Tools** | Who can find, run, change, and share saved tools |
| **Systems** | Who can view, use, test, and change connected-system configurations |
| **Credentials** | Who can use or maintain a saved credential set for a connected system |
| **Playbooks** | Who can view, use, change, and share reusable agent playbooks |
### How users receive access
Resource grants reach users in three ways:
* **Roles:** Admins grant access to the Member role or custom roles and assign users to those roles.
* **Direct sharing:** A resource can be shared with a specific user for an individual exception.
* **Ownership:** The creator of a resource retains owner access so they can continue to manage it.
Roles provide durable team-level access. Direct sharing handles one-off collaboration without changing a team’s role. Ownership protects the creator’s ability to manage their resource and cannot be removed from Access Rules.
### Effective access is additive
superglue combines every grant that applies to a user: their base role, custom roles, direct shares, and ownership. The most permissive grant wins. If one source grants **Viewer** and another grants **Editor**, the user’s effective access is **Editor**.
There are no deny rules that override an existing grant. Removing one grant only removes access if the user has no equal or stronger grant from another source.
### Viewer and Editor permissions
| Permission | What it means |
| ---------- | ------------------------------------------------------------------------------------------------------------------------ |
| **Viewer** | Can find and use the resource, such as running a tool or using a credential, but cannot edit it |
| **Editor** | Includes Viewer access and allows the resource to be changed; applicable sharing and management actions are also enabled |
Credential access is deliberately narrower: Viewer allows a credential set to be used, while Editor allows its name and secret values to be updated. Only credential owners and admins can change who the credential is shared with.
### Access follows resource dependencies
A grant to one resource does not silently grant access to everything it depends on. To run a tool, a user needs:
1. Viewer access to the tool.
2. Viewer access to every system the tool calls.
3. Access to a usable credential set for those systems.
When a tool is shared, superglue also grants the recipient the missing Viewer access to its required systems. Credentials are never shared automatically; the recipient must use their own credential set or receive a separate credential grant.
If any required access is missing, superglue blocks the action instead of running it with broader organization access.
## Configure roles and role-level access
Every organization member has one base role:
| Base role | What it means |
| ---------- | --------------------------------------------------------------------------------------------------------------- |
| **Admin** | Full organization access, including users, roles, resource access, API keys, and settings. This role is fixed. |
| **Member** | Standard team-member access. Admins configure the resources and permissions granted to everyone with this role. |
Admins can also create custom roles for teams, departments, or responsibilities. Users can have multiple custom roles in addition to their base role.
Open **Access Rules** from the sidebar to configure roles. For each resource type, an admin can grant Viewer or Editor access to either:
* All current and future resources of that type.
* A selected set of tools, systems, credentials, or playbooks.
Assign base and custom roles from **Organization**. The Admin role is read-only, while the Member role’s resource access and custom roles can be configured under **Access Rules**.
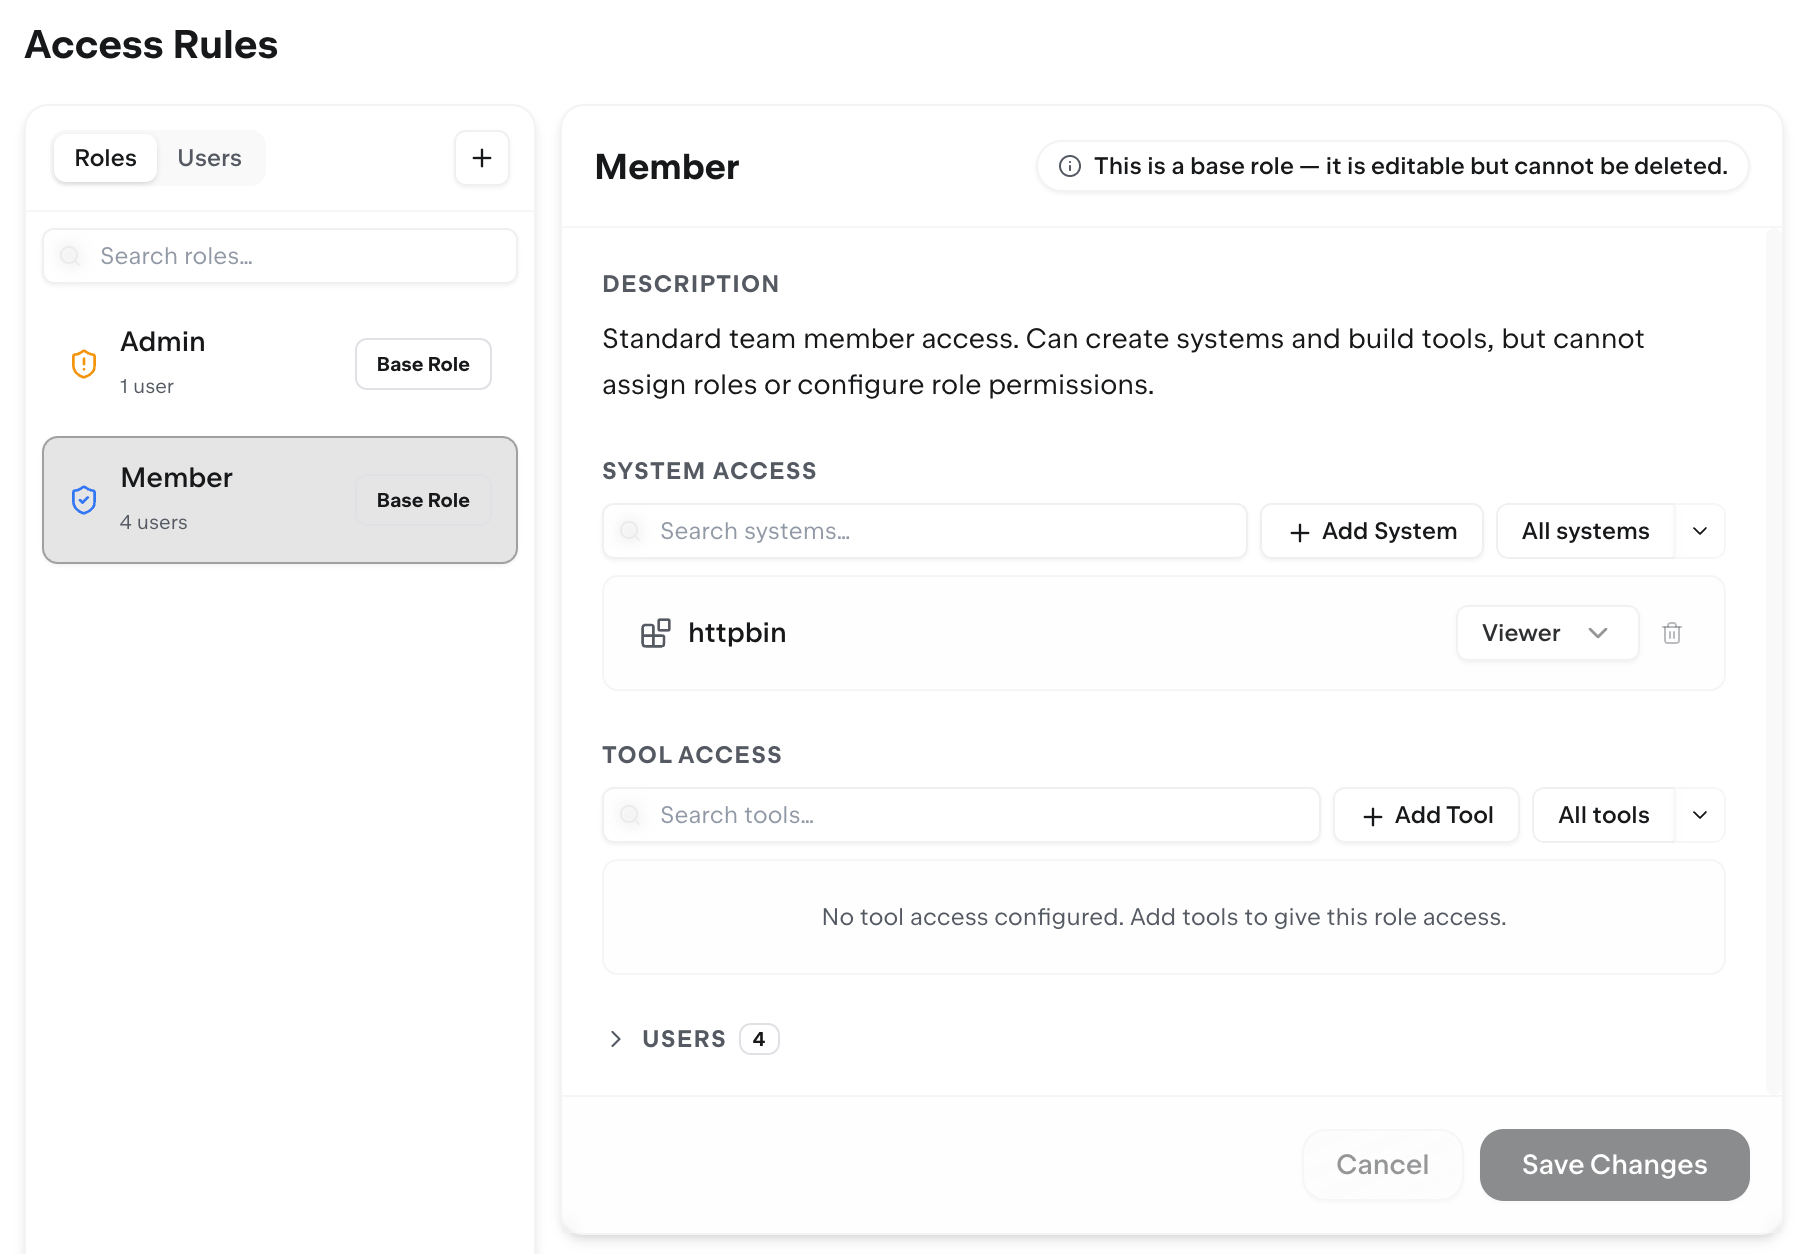
## Share individual resources
Direct sharing adds user-specific access without changing role-level rules. Use the **Share** action on a tool, system, credential, or playbook to grant Viewer or Editor access to an organization member. The dialog also shows access inherited from roles and ownership, making it clear why each person can access the resource.

For tools, sharing is run-ready at the configuration level: required-system access is included when needed. Credential access remains separate so secret-bearing resources are only shared deliberately.
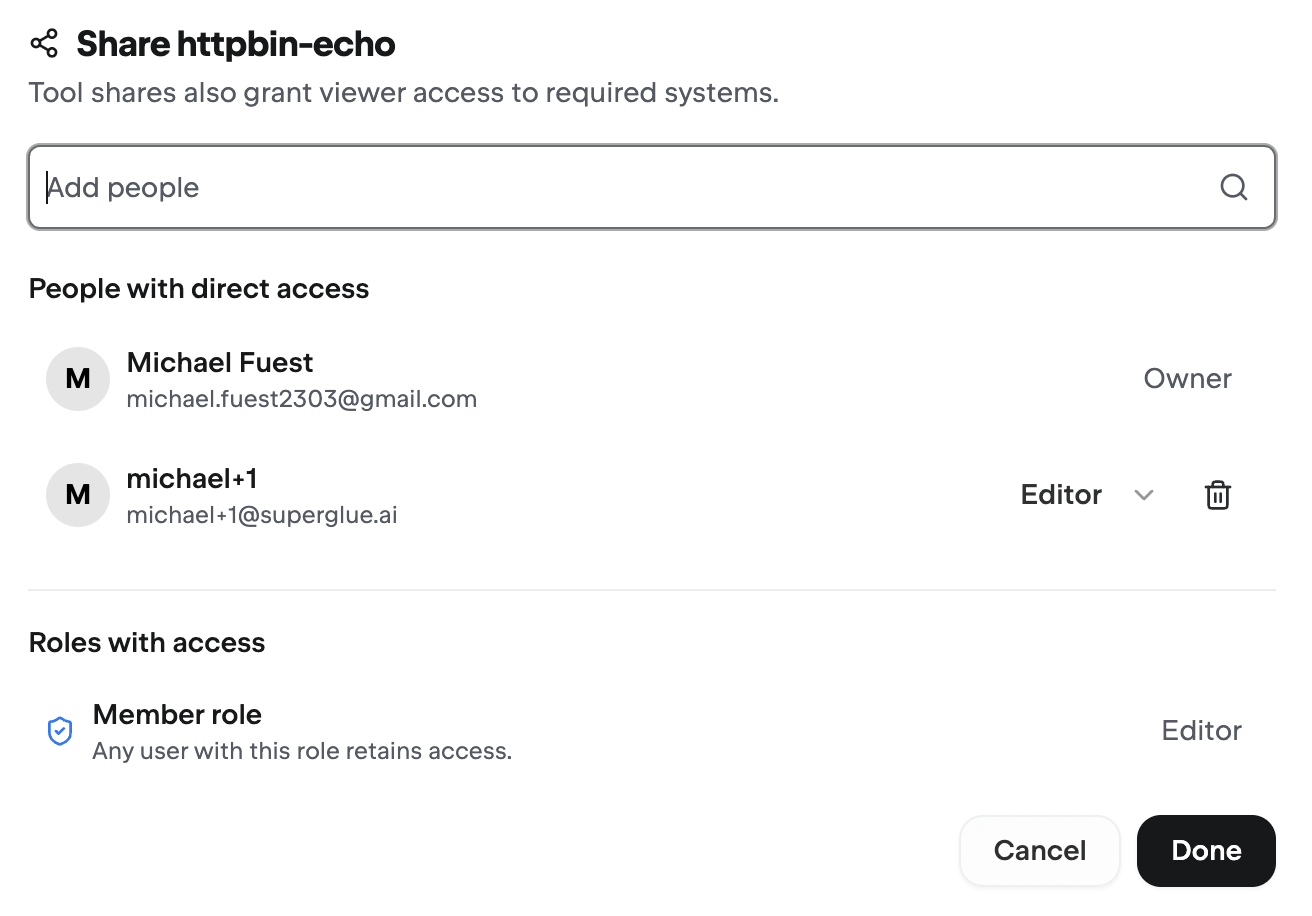
## Review effective access by user
Admins can open **Access Rules → Users** to review the effective access of an individual member. The view combines role-level access, direct shares, and ownership and identifies the source of each permission.
Use this view to:
* Understand why a member can access a resource.
* Add, change, or remove a direct share.
* Confirm whether a role or ownership still grants access after a direct share is removed.
Role-derived access is changed on the role, while ownership is not editable from Access Rules. This keeps the source of each permission explicit.
## Member experience
Members only see the resources they can access. Viewer access provides a read-only configuration experience while still allowing the resource to be used. Editing and management controls require Editor access and are otherwise hidden or disabled.
## Recommended admin workflow
1. Configure the **Member** role as the safe baseline for every organization member.
2. Create custom roles for durable team access, such as Sales, Support, Finance, or Data Operations.
3. Grant access only to the resources each role needs.
4. Assign users to base and custom roles from **Organization**.
5. Use direct sharing for individual exceptions instead of broadening a role unnecessarily.
6. Periodically review **Access Rules → Users** to confirm direct access is still intentional.
# Metrics & Telemetry
> Monitor superglue runs with Prometheus-compatible metrics
**Enterprise feature** — Metrics and telemetry are available for superglue Enterprise deployments. [Contact us](https://cal.com/superglue/superglue-demo) to discuss access.
superglue exposes organization-scoped run metrics in the Prometheus text exposition format. Scrape the endpoint with Prometheus directly, or use the Prometheus receiver to send the same metrics through an OpenTelemetry Collector.
## Endpoint and authentication
The cloud-hosted endpoint is:
```text
GET https://api.superglue.cloud/v1/metrics
```
Send a superglue API key as a bearer token. The key’s organization determines which runs are included, and its identity must have the `admin` or `member` base role.
```bash
curl "https://api.superglue.cloud/v1/metrics" \
-H "Authorization: Bearer $SUPERGLUE_API_KEY"
```
The response uses `text/plain; version=0.0.4; charset=utf-8`. Enterprise and self-hosted API hosts may vary; replace `api.superglue.cloud` with the host configured for your deployment.
## Connect your collector
Store the API key in your secret manager and mount it as a file where possible. The file should contain only the API key.
* Prometheus
```yaml
scrape_configs:
- job_name: superglue
scheme: https
metrics_path: /v1/metrics
static_configs:
- targets: ["api.superglue.cloud"]
authorization:
type: Bearer
credentials_file: /etc/prometheus/secrets/superglue-api-key
```
See the [Prometheus configuration reference](https://prometheus.io/docs/prometheus/latest/configuration/configuration/) for the complete scrape configuration.
* OpenTelemetry Collector
The OpenTelemetry Prometheus receiver accepts the same scrape configuration. Add it to your existing metrics pipeline and use the exporter configured for your observability backend.
```yaml
receivers:
prometheus:
config:
scrape_configs:
- job_name: superglue
scheme: https
metrics_path: /v1/metrics
static_configs:
- targets: ["api.superglue.cloud"]
authorization:
type: Bearer
credentials_file: /etc/otelcol/secrets/superglue-api-key
service:
pipelines:
metrics:
receivers: [prometheus]
exporters: [otlp]
```
The `otlp` exporter must already be configured for your backend. See the [OpenTelemetry Prometheus receiver](https://github.com/open-telemetry/opentelemetry-collector-contrib/tree/main/receiver/prometheusreceiver) for supported configuration and deployment considerations.
## Available metrics
| Metric | Type | Measures |
| ------------------------------------ | ------- | ----------------------------------------------------------------------- |
| `superglue_runs_total` | Counter | Completed runs in retained run history, grouped by status and source |
| `superglue_run_duration_seconds_p95` | Gauge | p95 end-to-end duration for completed runs in the trailing five minutes |
Both metrics are scoped to the API key’s organization. Responses are cached for up to 10 seconds.
### Run count
`superglue_runs_total` includes runs with `success`, `failed`, or `aborted` status.
| Label | Values |
| -------- | ------------------------------------------------------------------------------ |
| `status` | `success`, `failed`, `aborted` |
| `source` | `api`, `frontend`, `agent`, `scheduler`, `mcp`, `cli`, `tool-chain`, `webhook` |
The counter reflects retained run records. Permanently deleting run history can reduce its value, which monitoring systems should treat like a counter reset.
### Run duration
`superglue_run_duration_seconds_p95` is calculated from completed runs in the previous 300 seconds. It exposes the same `source` values and a fixed `window="300s"` label. A source with no completed run in that window has no time series.
## Useful queries
### Throughput by source
```txt
sum by (source) (increase(superglue_runs_total[5m]))
```
### Failure ratio
```txt
sum(increase(superglue_runs_total{status=~"failed|aborted"}[5m]))
/
clamp_min(sum(increase(superglue_runs_total[5m])), 1)
```
### Scheduled run failure
```txt
increase(superglue_runs_total{source="scheduler",status="failed"}[15m]) > 0
```
### Slow API runs
```txt
superglue_run_duration_seconds_p95{source="api"} > 10
```
When an alert fires, open [Runs](/docs/enterprise/run-history/) to inspect the affected execution, its step results, and the recorded failure.
# Single Sign-On (SSO)
> Configure Okta OpenID Connect for superglue
**Enterprise feature** — SSO is available for superglue Enterprise deployments. [Contact us](https://cal.com/superglue/superglue-demo) to discuss access.
superglue supports Okta through OpenID Connect (OIDC). Okta authenticates the user, while superglue creates the account on first sign-in, adds it to one configured organization, and synchronizes its base role from the signed ID token.
## Before you begin
You need:
* An existing superglue organization and its organization ID.
* An Okta administrator who can create an OIDC application and token claim.
* A public superglue app URL that Okta can redirect users back to.
* A role rule that maps every assigned Okta user to either `admin` or `member`.
## Configure Okta
1. **Create an application:** In **Applications → Applications**, create an **OIDC - OpenID Connect** integration with **Web Application** as its type.
2. **Enable the flow:** Enable the **Authorization Code** grant and client-secret authentication. superglue also uses PKCE for the authorization flow.
3. **Register the callback:** Add `https:///api/auth/oauth2/callback/okta` as a sign-in redirect URI.
4. **Assign access:** Assign the users or groups that should be able to sign in.
5. **Add the role claim:** Configure an ID-token claim named `userType` or `user_type`. It must always return exactly `admin` or `member` for every assigned user.
superglue rejects a login when the role claim is missing or has any other value. This protects the organization from users being provisioned without an explicit base role.
Use a custom Okta authorization server so the role claim is included in the ID token issued during the authorization-code flow. Configure the claim as an **ID Token** claim, include it **Always**, and derive its value from the user profile or group policy used by your organization. Then use that authorization server’s issuer for `OKTA_ISSUER`, for example:
```text
https://your-domain.okta.com/oauth2/default
```
Okta’s [custom-claim guide](https://developer.okta.com/docs/guides/customize-tokens-returned-from-okta/main/) explains how to add and preview an ID-token claim. Custom authorization servers may require Okta API Access Management in production.
## Configure superglue
Set the following deployment variables:
| Variable | Value |
| ---------------------- | ----------------------------------------------------------------- |
| `AUTH_PROVIDERS` | Include `okta`; use `okta` alone for an SSO-only login page |
| `OKTA_CLIENT_ID` | Client ID from the Okta application |
| `OKTA_CLIENT_SECRET` | Client secret from the Okta application |
| `OKTA_ISSUER` | Exact issuer of the authorization server that adds the role claim |
| `OKTA_ORG_ID` | Existing superglue organization that receives provisioned users |
| `AUTH_DISABLE_SIGNUP` | Required boolean controlling non-Okta self-service registration |
| `AUTH_DISABLE_INVITES` | Required boolean controlling organization invitations |
For an SSO-only deployment:
```bash
AUTH_PROVIDERS=okta
OKTA_CLIENT_ID=...
OKTA_CLIENT_SECRET=...
OKTA_ISSUER=https://your-domain.okta.com/oauth2/default
OKTA_ORG_ID=...
AUTH_DISABLE_SIGNUP=true
AUTH_DISABLE_INVITES=true
```
Both account-creation flags must be set explicitly. Setting both to `true` is valid when Okta is configured because Okta just-in-time provisioning remains available. The deployment rejects that combination when no Okta provider is configured, as it would leave no account-creation path.
## Provisioning and role sync
On each successful Okta login, superglue:
1. Verifies the ID token against the configured issuer, client ID, and Okta signing keys.
2. Requires the `email` claim and a valid `userType` or `user_type` role claim.
3. Creates the superglue account on first login without requiring an invitation.
4. Adds or updates membership in the organization specified by `OKTA_ORG_ID`.
5. Assigns the `admin` or `member` base role from the token claim.
Existing users can also sign in with Okta. Other login methods remain available only when they are listed in `AUTH_PROVIDERS`.
## Deprovisioning
The current integration provides just-in-time provisioning and role synchronization, not SCIM deprovisioning or Okta-driven session revocation.
Deactivating a user in Okta prevents future Okta sign-ins, but an existing superglue session is not revoked automatically. To terminate access immediately, remove the user’s organization membership in **Control Panel → Organization**. Reassign or disable any schedules, API keys, or other resources owned by that user as part of the same offboarding process.